This article series is now available as a professionally formatted, distraction free paperback or ebook to read offline at your leisure.
Many young men will likely find themselves dressed in jeans most of the time. But there will be occasions where you’ll need to wear a nicer pair of trousers – a job interview, a networking event, a formal church service, and, if you play your cards right, your own graduation! A nicely pressed, non-wrinkled pair of pants finishes off an outfit, and gives you a sharp, put-together look. Having your pants pressed at your local cleaners is one easy option. But for a young man who wants to save a few bucks, or is pressed for time, this is an important skill to know. Learning how to iron your pants yourself will make you more self-sufficient and offer a basic understanding of the clothing you put on.
Watch the Video
Why Men Do Not Iron Their Trousers
1. Fear of damage – Also called “The Shining” (no, not the Stephen King book). Rather, this is what happens when trousers are ironed improperly with too high of a heat setting and the iron is pushed repeatedly across the fabric. The fabric is molded and the weaves are compressed, resulting in a nonporous sheen that makes your trousers look cheap and reduces their lifespan.
2. Lack of information – Google how to iron a dress shirt and you’ll find tons of guides and videos out there. How to press trousers? Not so many, and half of them are providing bad advice!
3. They think no one notices – More than half the guys in your office don’t iron their trousers or shirts — who is going to notice, right? Wrong — if you have ambition beyond entry-level work, dress for the position you aspire to.
4. They’re not even sure they should be ironed – In general, all types of pants should be ironed except cargo pants and jeans (unless you’re into the western look). This is because of their informal nature. Wool trousers should be pressed between dry cleanings when needed, such as after unpacking for a business trip. Most cotton trousers, like chinos, are washed at home, and should be pulled from the dryer slightly damp. They should be ironed at this point for the easiest time pressing. Synthetic dress slacks are often dry cleaned, although this isn’t really needed, and should be pressed between wearings, when wrinkles appear.
The ironing instructions below will leave a crease down the center of the pant legs. For more casual pants like khakis, you may want to iron the pants without a crease.
What You’ll Need
- Ironing board
- Iron
- Distilled or purified water
- Spray bottle (unnecessary if the iron has a built-in spray nozzle)
- Clean trousers
For more tips on ironing boards and selecting a quality iron – click here for a classic AoM article on how to iron a dress shirt.
Important Points
- Press the iron (pick it up, put it down); do not push it across the clothing.
- Examine the trousers for stains and remove the stains/dirt BEFORE ironing. Otherwise you will have a permanent stain.
- Ironing time is not an exact science — but the rule should be as little time as it takes to press out the wrinkles. Steam helps a lot. I start with 2 seconds, then modify the time depending on the fabric thickness and reaction to pressing.
- Ensure the iron is the correct temperature for your trousers. For example, wool can easily be damaged by too much heat. You need to let the iron cool and make sure it is set correctly when ironing trousers after doing shirts (which are normally made from cotton and thus need a higher temperature setting). For this reason I always recommend ironing your trousers before ironing your shirts.
Setting Up the Iron
You can mostly follow manufacturer’s directions for this step, but the basics are simple:
- Fill the water reservoir if there is one.
- Set the heat for the fabric you’re ironing — use the iron’s guide or check the tag on the trousers for the appropriate heat.
- Turn the iron on and let it heat up before use.
You want a bit of steam when you’re pressing trousers, so use a steam iron, and if possible, one with a nozzle that lets you spray water as you go. If your iron doesn’t have a nozzle, keep a spray bottle handy to spray the trousers down ahead of the iron.
How to Press Your Trousers
I divided pressing your trousers into three parts with a total of ten steps.
Part I – Set-Up & The Top of Your Trousers
Step 1: Double Check Your Temperature and Trouser Cleanliness
Check the trousers for stains or dirt and remove before ironing. Next check the label, and ensure the iron is set for that type of fabric.
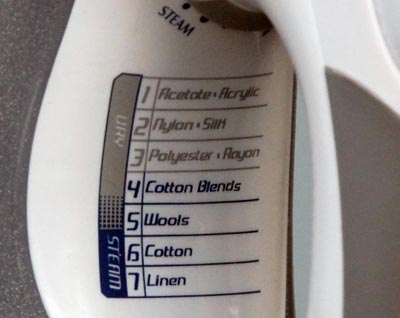
When ironing a blended fabric, choose the lowest (coolest) setting of the two fabrics. If you are ironing a 70% wool/polyester blend, you would start at 3 and maybe go up to a 4. Lower temperatures will take longer to set a crease, but they are less likely to damage your pants.
Step 2: Iron the Linings of the Pockets
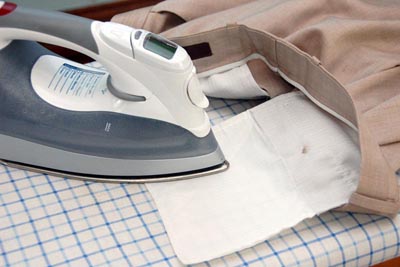
Most dress trousers have inside pocket linings. Although no one will ever see these, if they are severely wrinkled and you wear your trousers close fitted, an impression of the wrinkles might be visible. Prevent this by smoothing out the lining. Note that linings are often made from cotton. You might have to start with a hotter temperature if you are ironing wool trousers, and then let the iron cool for 5 minutes before pressing the rest of the pants.
Step 3: Iron the Waistband and Top Part of the Trouser
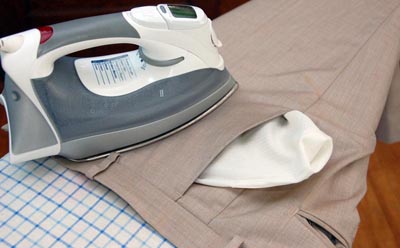
Turn front pockets out and then press the iron on the top of the leg. Lift the iron up, reinsert the pocket, and continue to press along the top of the trouser, paying special attention to pleats and re-forming any folds. Remember, we are pressing and lifting the iron — not pushing it along the fabric.
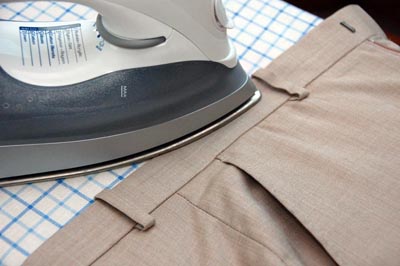
Move to the seat of the trousers, and pull out the back pockets. Press these areas and then move up to the waistband.
Finally, move to the opposite front side of the pants, turning the pocket inside out and repeating the process.
Part II – Pressing Your Trousers’ Creases
Step 4: Mark the Trouser Crease at the Bottom
Lay the trousers flat on the ironing board with the cuffs right at one end, waist draped over the far end. The waist can hang off a bit if the board is short.
Flip a trouser leg up and off the board so that you’re working with just one leg, and lay it flat on the board. Look inside the cuff and find the two seams.
Arrange the trouser leg so that one inseam lies right on top of the other, dead center of the flat leg. With the inseams in the center, the edges of the trouser leg are where you want to press the crease.
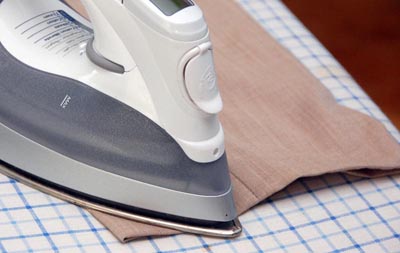
Spray the cuff with a bit of water and press down gently on each side of the trouser leg. This should leave a visible crease at the cuff and an inch or two up the leg.
Step 5: Mark the Crease at the Top
Find the same two vertical inseams and match them up, one on top of the other, just like you did above in Step 4, but this time at the top of the pants.
Lay the top of the trouser leg flat with the inseams centered.
Wet the outer edge of the trouser leg and use the iron to gently press a crease into place along that edge, about six inches down from the waistband.
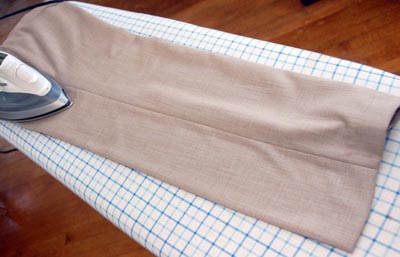
Don’t press the crease all the way up to the waistband. The bottom of the pockets (on the inside of the trousers) is a good place to stop, or if you have pleated trousers you can just press the crease right up to the bottom of the side pleats.
Step 6: Press the Front Crease
Now that you’ve got the start and finish of the crease marked, it’s just a matter of connecting the dots. If the inseams are still set one atop the other, the crease should be the very edge of the trouser leg as it lies flat.
Press gently down in one spot with the iron. Then lift the iron, move up a bit, and do it again, always pressing straight down rather than pushing and sliding along the crease.
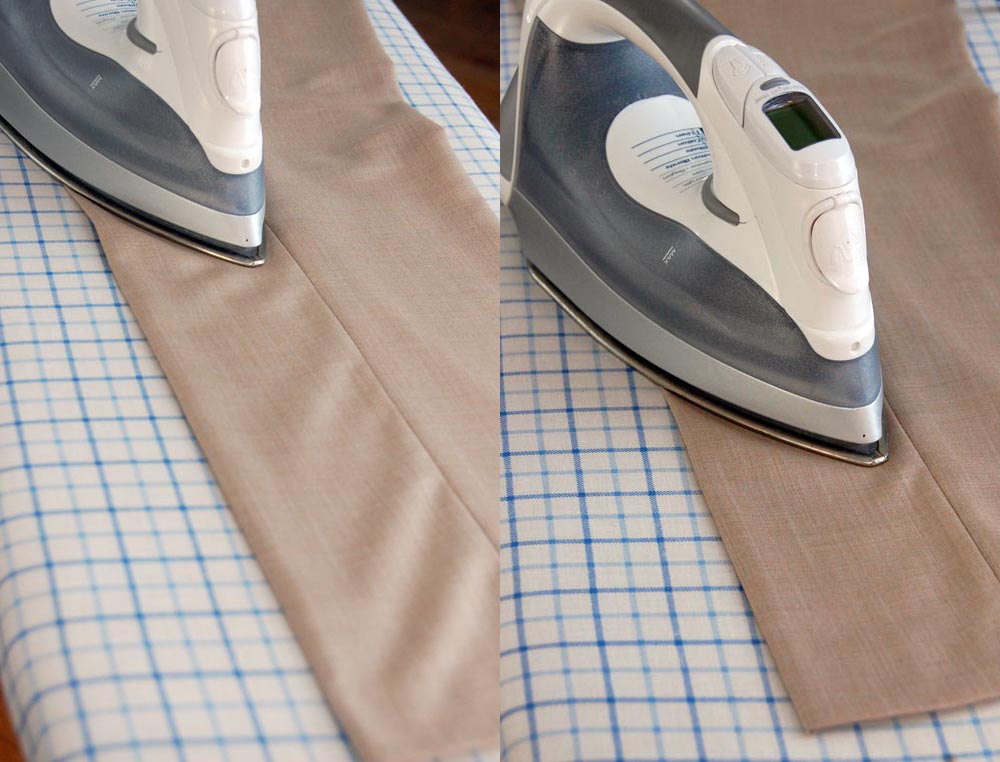
Work all the way up from the marker at the cuff to the marker just below the pockets. It’s worth reaching inside the trouser and pulling the pocket aside so that you don’t accidentally press its shape into the trouser leg while you’re working on the crease.
Step 7: Press the Back Crease
The back crease (the one that follows the inside of your leg) should be directly opposite the front crease, also at the very edge of the trouser leg as it lies flat. Repeat the same process you used to create the front crease, again pressing straight down, gently pressing to set the crease in place, and then lifting the iron back up again.
Part III – Pressing Down the Leg
Step 8: Press Down the Trouser Leg
Once you’ve got your creases set you can press the center of the trouser leg between the creases to get out any small wrinkles or folds. Use the same motion you’ve been using: press the iron flat, pick it back up, and repeat again a little further along.
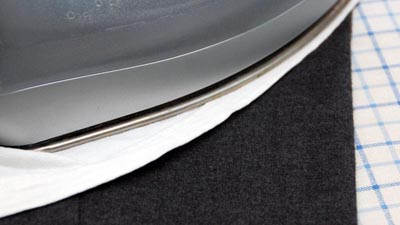
If you’re worried about the trouser fabric, you can cover it with a thin, clean white cloth and press through that. In the case of delicate or napped weaves (such as grey flannel trousers) a barrier helps prevent “shine,” which is the slicked-down look you get when you’ve ironed too hard or at too high of a temperature.
You do not need to press both sides of the same trouser leg.
Step 9: Repeat for the Other Trouser Leg
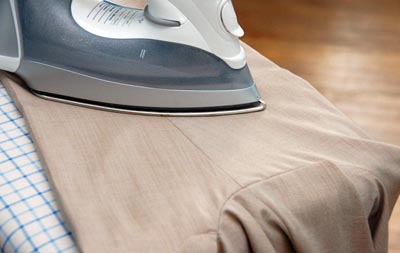
Once you’ve pressed the creases and the leg, you’re ready to switch to the other side. Repeat the process above.
Step 10: Iron Seat and Front of Trousers as Needed
The seat and front of the trousers don’t usually need pressing the way the crease does, but if you do want to press them be sure to turn the pockets inside-out before applying the iron. You can actually slip the pants over the ironing board (as if you were putting the pants onto the board instead of your legs) to keep the front and back panels separate, allowing you to iron them one at a time.
Once you’re done ironing both legs (and the rest of the trousers, if desired), be sure to hang them to let them dry completely before wearing. If you wear the trousers damp you’ll work the crease right back out, wasting all your hard work.
Limitations – The Case for an Occasional Professional Pressing
Trousers should be periodically pressed by a professional. The reason is that professional dry cleaners have a special iron and vacuum board that uses a combination of steam being pressed in and immediately sucked out. This produces impeccably ironed pleats, which can last for a week or more worth of wearings.
__________________
Written by Antonio Centeno
Creator of the Internet’s Largest Men’s Style Video Library


