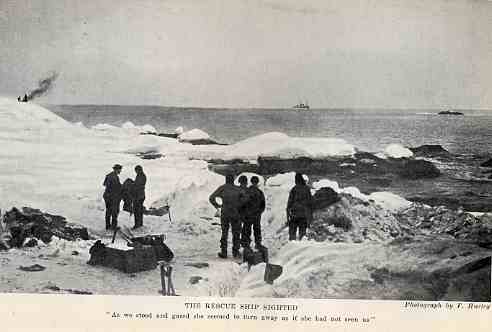
Let’s say your plane crashes on a desert island and you’re stranded with only a rugby ball as your friend (a volleyball isn’t a manly enough companion for you). Each day you scan the skies, waiting, hoping, aching, to spot a rescue plane coming your direction. If a plane does buzz your island, will you be able to catch the pilot’s attention, or will he fly on by, oblivious to the crazed bearded man screaming below?
Cell phones and GPS die and break. Knowing how to signal your distress with natural resources and basic tools is a valuable skill. Whether you’re marooned on an island or lost in the wilderness, a man needs to know how to get help.
Signal Fire 101
Make sure you don’t miss your chance for rescue while hunting for a pig.
The most common and most effective method of signaling for help, assuming you don’t have any form of electronic tech, is the signal fire. A well-built signal fire will attract attention for miles in every direction. It also has the added benefit of indicating to an airborne rescuer (i.e. helicopter) what the wind conditions are like in your location. A good signal fire differs in several ways from your basic camp fire or cooking fire, however, and you will want to make sure you get these differences right in order for your signal to be as effective as possible.
First, you will need to evaluate your resources. If you are in an area with an abundance of dry wood, there is no reason why you shouldn’t keep your signal fire lit as long and often as possible. However, if you are in an area with little fuel available, you are much better off preparing a pyre and waiting until the appropriate moment, such as sighting a search and rescue plane, occurs. You will want to place the pyre(s) in a large, open area on high ground where they are easily visible if possible. Consider building not one, but three of these pyres and placing them about 100 paces apart in a triangular configuration. Three is understood to be an international indicator of distress, as is the triangle layout.
As for the construction of these pyres, you will want to build them in a manner that allows the wood to stay dry and ready to be lit. Furthermore, you will want to be sure that they are able to be lit immediately if possible. To accomplish this, build an elevated platform for your fire. Lean three long, straight boughs together in a teepee formation and bind them at the top with wire, cord, or vine. Then create a platform halfway down the branches by tying cross-thatched branches to the three supports. With this support system in place, you are ready to add your fuel.
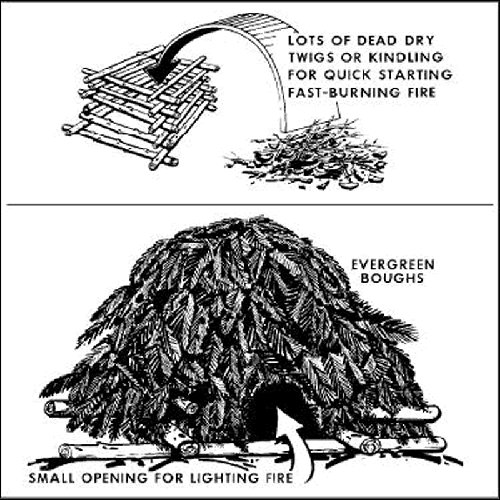
An alternative to the teepee method.
You want to have good, dry tinder for the first layer. If you can find one, an abandoned bird’s nest makes excellent tinder, as does paper, wood shavings, or dry grass. After laying out a thick layer of tinder, layer on small wood kindling in the form of small broken up branches. Just as with a regular fire, as you add layers, the size of the fuel should increase as well. For a fire that burns slower but still emits a great deal of smoke, you can add a layer of peat moss, wet leaves, or other decaying plant life on top of your main fuel wood.
Your signal fire needs to produce a great deal of smoke, so the final layer should consist of green, leafy vegetation or brush. Green, living brush creates a thick white smoke almost immediately when added to a burning fire. If you are stranded with a non-functioning vehicle, you can place tire rubber and crank-case oil on the top for a thick plume of black smoke, which makes your smoke more visible on a overcast day.
At night, creating smoke is no longer as important and instead you want large visible flames.
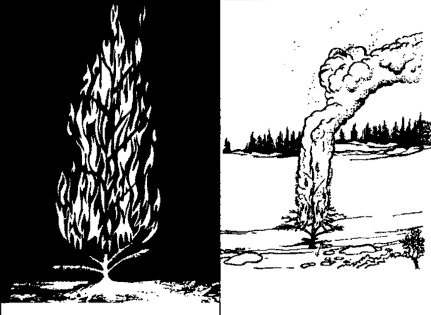
Tree Torch
As an alternative to the traditional signal fire, you can create what the US Army calls a “tree torch.†If you can locate a tree in a clearing which has green leaves and is a considerable distance away from other trees (thus less likely to spark a forest fire), you can use it to make a giant torch. Load all easily reachable branches with dry tinder that will light easily. When lit, the tinder will burn while the living tree creates a massive smoke plume which will be visible for miles.
Audible Signals
Aside from signal fires, there are several other methods of signaling you should have at the ready. Regarding noise-based signaling, you will want to follow the rule of threes as well. If you have a firearm, three shots spaced five seconds apart will signal distress. Additionally, by spacing the shots out you give anyone within earshot time to identify the sound and then focus in on the direction it is emitting from. Failing to space the shots out will likely result in anyone who hears them assuming you are a hunter who missed his first shot and is firing consecutive follow-up shots.
If you don’t have a gun with you, a whistle also makes an excellent signal. There really is no excuse for not having a whistle in your pack, as they are light and take up virtually no space. Again, follow the rule of threes when signaling. The added benefit of a whistle is that it requires little effort (as opposed to prolonged yelling) and it will never run out of ammunition. Even if you are completely incapacitated, as long as you are lucid enough to put the whistle in your mouth you will be able to signal with it.
Visible Signals
In addition to your signal pyres, you can also build signal mounds indicating someone in the area is in distress. These are essentially three large rock piles arranged in a triangle in an open area visible from the sky. The taller the better, since taller structures will cast longer shadows, making them much more visible. If you are not immobilized and intend to stay on the move, use rocks or fallen logs to create a large arrow pointing in the direction you are traveling. Again, the higher and larger the better, making sure that your arrow is a minimum of ten feet long. Remember that if you do this, you will need to maintain travel in the indicated direction. Straying from your indicated course would be a potentially fatal error and could leave search and rescue looking in the wrong area.
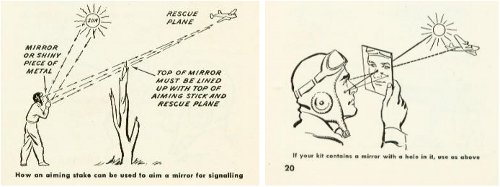
Flashlights and strobes are another obvious choice for signaling. If you have a target you are attempting to signal, flash out SOS in international Morse code to make them aware of your situation (three short flashes, three long flashes, three short flashes). Another option is using a reflective metal or mirror to redirect available light for use as a signal. Signal mirrors are included in many first aid survival kits, but things like belt buckles can do in a pinch.
 Finally, assuming your signal is successful, you’ll need to be able to understand the signal being sent back to you. If an airplane flies overhead and rocks back and forth, dipping its wings consecutively, your message has been seen and is understood. At night, acknowledgment of a signal is accomplished by repetitive flashing of a green running light. If they have seen your signal but do not understand, they will fly a circle above you. In this event, you need to make every effort to clarify your situation. Holding your arms up in a Y pattern will indicate that yes, you do need help. Holding one arm up and one arm down, signifying an N shape, will indicate that no, you do not need assistance.


