Editor’s note: This is a guest post from Adam Cook.
If you love backpacking or just being outdoors, but always wanted to add something extra to the experience, then mountaineering is for you. Mountaineering itself is a relatively simple sport; just make it up to the top of a chosen mountain. The problem lies in the extreme range of situations you encounter as you pass through higher and higher altitudes, but it’s a welcome challenge for many that participate in the sport. If you already know a bit about backpacking and being outdoors in general, it’s easy to transition to mountaineering and start bagging peaks in no time. There are just a few things you need to know. Remember, a lot of this is dependent on how big the mountain is and how long you are going to be alone in the wilderness. You would need far less food for an afternoon on Pikes than 40 days in Tibet climbing in the Himalayas.
1. Terminology
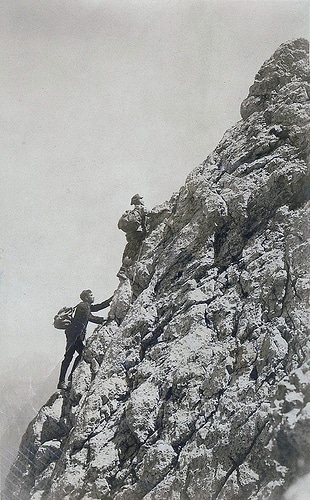
Learning the mountaineering lingo is important when you start reading about climbing as well as to understand the rest of this article. Mountains are often categorized by height. In the US, a 14er is a mountain that is at least 14,000 feet. The rest of the world goes by meters, so 4Kers to 8Kers are common. A climb is also graded by ‘class,’ which is really determined by steepness and exposure. A flat trail with no exposure to danger (i.e. a fatal fall) would be Class 1. Class 2 and 3 are slightly steeper with some possibly challenging obstacles in the way. Class 4 is mainly a hands-and-knees scramble, while Class 5 is technical climbing where both members are usually belaying one another.
2. Basic Skills
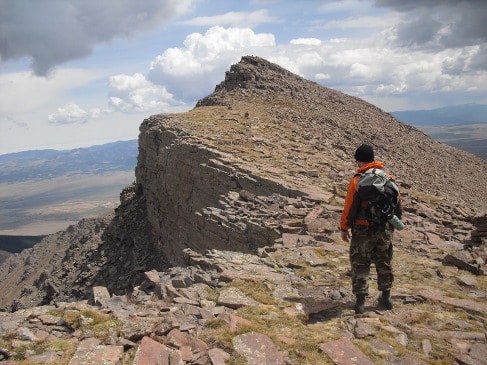
Most 14ers in the US offer non-technical routes that can be climbed by any fit person. Humboldt Peak in Colorado is my favorite Class 2/3 mountain due to the scenery and isolation. Pikes and Longs are also classic lower class mountains, but they are often crowded during the summer months. But if you want to start seriously mountaineering, you are going to need to take up rock climbing. Even large mountains like Everest are mainly class 2 and 3, but you want your technical skills to be rock solid (pun intended) when you reach the 20% of the climb that is technical. You should be climbing 5.9’s at a local crag or rock gym with relative ease.

3. Basic Gear
Protection and speed is the name of the game here. I learned the hard way that a cheap tent is not going to hold up in a mountain storm with 80 mph winds and ice. Invest in a serious 4-season tent. This will be one of the most expensive things you buy, but without a tent, your trip is over. You’re also going to want bivy gear and rain protection. Bivy gear can be anything you need to set up a quick, temporary shelter. Trash bags and a hiking pole work, but so does a 200 bivy sack from an online retailer. Also remember to buy quality layering clothes. You’re only going to bring one set of clothes for an entire week in the mountains, so make sure it’s quality stuff! Here are some more specifics on what to bring:
One Day Lower Class Hike/Scramble-Up
- Day Pack: A small backpack.
- Things to look for: We’re talking climbing here, not backpacking comfort. The pack should be light and have no wrap-around belt or bulky padding. It should be large enough to fit your camping stove (if you’re eating dehydrated meals), a rain jacket, and some para chord. If you’re only eating things like beef jerky and trail mix, you can skip the stove.
- Water Purification: On most mountains, there are opportunities for water on the way up. But before gulping it down, you need to purify it.
- Things to look for: In this kind of situation, you will want water purification tabs. It doesn’t really make sense to boil water for a day hike, and it’s a ton of weight to carry if you know you don’t absolutely have to. There are dual-packs of tablets that include iodine and an iodine remover that leaves the water clean and tasting pure. If there are no water opportunities on the way up, you need to bring at least 4 Nalgene bottles worth of H2O.
- Rain Jacket: A lightweight jacket made of gore-tex or another waterproof, breathable material. You need this EVEN if the weather is going to be sunny. This jacket can be used to make a quick, makeshift shelter should the weather turn for the worse. Bring para-chord or string along just for shelter or other random purposes. It is very possible to get lost on a mountain, as silly as that sounds. One day on Crestone Peak, two groups met at the top. One group made it to the bottom and the other was never heard from again.
- Small First Aid Kit: An ace bandage and athletic tape is a very basic first aid kit. You can use your iodine tabs to sterilize any wounds, so there’s no reason to bring the extra weight of sanitizing creams. You can also use the bandage and tape for a ton of other things, including make-shift gloves if there is a large crack on your route that you want to climb.
- Food: 2 meals would be sufficient, even one if you are going light or want to make breakfast or lunch non-cook only. You need calories to perform at your best, and dehydrated meals are relatively inexpensive and super light. I like to bring them just for the morale boost. A cooked meal gives you ~30 minutes to sit, relax, and really take in the awesome scenery. Keep in mind though, if you’re running behind on time and the weather looks like it’s turning, there may not be a lot of time to sit down and cook. This is why I always bring a quick snack no matter what my plans are.
- Headlamp: You’re starting early, right? Great! So then a headlamp should be required since you’re starting before the sun comes up. If it’s a short hike, possible if you camped half way up, still bring it. If weather sets in and night falls, it is nearly impossible to navigate without a headlamp. The headlamp should be able to fit around your helmet if you have one, and be adjustable to fit around your bare head. Many climbers have been forced to stay on the mountain just because they were benighted without a headlamp. It’s silly to try and justify not bringing an 8oz. headlamp.
Single Day Technical Climbs
This is mostly the same as above, as the great majority of a technical climb will still be hiking and scrambling. But you need a few more things for a more advanced climb. Just to give you an idea, here’s some of the extra gear you would need for a technical 5th class pitch (a section of a route that is separated by areas suitable for belaying or resting).
- Helmet: This should be a certified climbing helmet that is made by a reputable brand.
- Things to look for: The helmet should be adjustable. During summer ascents it will go on your bare head but in the winter you will be wearing a cap or have your hood up.
- Dynamic Rope: This should be a bit longer than your longest pitch. Most ropes are 60 to 70 meters. If the pitches are very short (~75 feet), get a larger rope cut in 2 or order a shorter rope to use on short pitches. I’ve had a 70m rope for a 50 foot pitch and it was really more of an inconvenience than anything.
- Things to look for: It must be dynamic and must be a single rope. Double ropes have their place but that’s neither here nor there. It should also be a treated, waterproof rope. Non-treated rope is good for sport climbing, but in the mountains there are too many opportunities for moisture to find its way to your rope and make for some heavy packing.
- Trad Gear: It’s best to take a class or at least read a few books on this subject. A basic alpine rack consists of slings (nylon loops used to extend anchors if your path is zig-zaggy), plenty of locking and non-locking carabiners, cams, hexes, and nuts. Those last 3 are all cramming devices that are inserted into cracks in the rock to serve as protective anchors. This is your only lifeline, which is why I stress taking a class or getting some solid books and a little practice on the local crag before heading off on your own.
4. How to Pack
Don’t be like me and take over 100 lbs of gear for your first week in the mountains. You only need one extra set of boxers and 2 extra pairs of socks. You’re going to be wearing the same shirt and pants for your entire expedition. Bring Gold Bond and baby wipes to take a makeshift ‘shower.’ Put the Gold Bond into a plastic bag, same with the wipes. You’re trying to pack everything you need for an entire week into 1 bag. You obviously need food, but it should be the dehydrated kind and it should be taken apart and repacked. Also bring a smaller bag for acclimatization hikes and summit pushes. You don’t need 4 days of food for 5 hours away from camp. You want to be light and fast!
5. Planning
There are tons of sources out there on mountain routes. 14ers.com is a good one for Colorado, and there are plenty of books available on larger mountains like the Matterhorn. Be sure to read up before your trip. Join a forum and ask questions. Bring plenty of pictures with you, along with a compass and topo map of the area. A mountain is very different in 2d than in 3d, so the more prepared you are, the less overwhelmed you will be. Once you get there, allow at least one extra day should weather go sour or the route be more difficult than planned. Always have a “plan B” in mind. If the route is questionable, it’s good to have something else to do. It’s hard to convince your ego that you can’t do something and to just turn around if it’s the sole reason you traveled so far.

6. Acclimatization
If you’ve always wanted to know what it’s like to be on top of a massive mountain, shove ice down your pants, grab a straw, and run up and down the stairs breathing through it to get a rough idea. Note: don’t actually do that. Acclimatization is a serious deal though. Mountain sickness and Accute Cerebral/Pulmonary Edema are very real and very dangerous. You want to avoid this at all costs as it can be very fatal. To acclimate, you want to slowly climb higher and higher. This isn’t a huge deal at lower altitudes or one day trips, but it becomes a pressing issue above 10,000 feet when you’re going to be setting up a camp. Also remember to sleep low and climb high. Being at altitude can cause insomnia which can hinder your motivation and fitness. It’s best to climb high and spend the afternoon there, then return to your lower camp to sleep and get a good night’s rest. This is why climbers have numerous camps on large mountains. They climb high and build the advance camp, then return to the lower camp to sleep.
7. Bits of advice
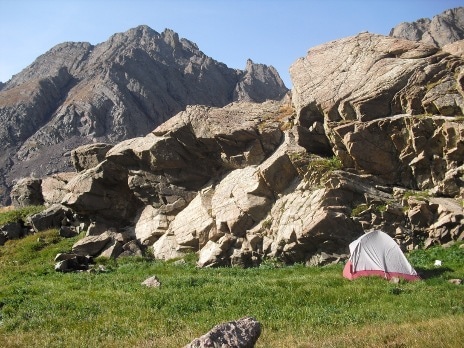
Remember to place your tent where it will be out of the wind. Find a cove of boulders, trees, or dig out a ledge in the snow. Mountain winds can also change over the course of several days so be prepared to move camp should the need arise. Always remember to hydrate. At altitude you need twice as much water as you would back at home. If you feel a headache coming on, take it easy. If things get worse, be prepared to kick your ego to the side and come down the mountain. Weather can change in an instant on a mountain. Afternoon thunderstorms are extremely common and lightning is very dangerous at altitude (think: you’re the highest point around for miles!). Start climbing while it’s dark in the morning and plan to be headed down the mountain by early afternoon. A daring mountaineer is a short lived mountaineer. The mountain will always be there next year.


