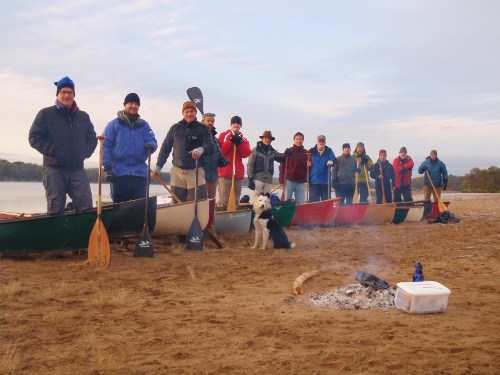
“The way of a canoe is the way of the wilderness, and of a freedom almost forgotten. It is an antidote to insecurity, the open door to waterways of ages past, and a way of life with profound and abiding satisfactions. When a man is part of his canoe, he is part of all that canoes have ever known.†– Sigurd Olson
Canoe tripping is part of the fabric of the North woods. It was the canoe that carried Native Americans throughout North America. Canoes brought the first Europeans into the interior of the frontier to trade and proselyte. And it was from the inside of a canoe that Lewis and Clark explored and mapped our new nation.
So it is no wonder that the idea of paddling away from civilization and into the wilderness has always held great romantic appeal for men. What man has not sat at his desk, surrounded by the walls of his cubicle, and closed his eyes to imagine gliding through the water of a clear river, surrounded on both sides by emerald forests or vibrant fall foliage?
But it needn’t remain a mere fantasy. Canoe tripping is not only romantic, it’s also a very practical way to camp.
The utility of the canoe is undisputed. In the hands of a skilled paddler, it can carry amazing amounts of gear, navigate waters from tiny streams to vast oceans, and do it with a panache that is unquestionably manly.
Last time, we talked about one of the advantages of car camping over backpacking; mainly, that with car camping you can pack more gear, allowing you to camp more comfortably and cook and eat more delicious grub. Of course the downside of car camping is that it lessens the feel of getting away from civilization and losing oneself in nature.
Well, with canoeing, you can have the best of both worlds. You can plunge yourself deep into the wilderness, a la backpacking, while at the same time carrying 100 pounds of gear in your canoe. It is camping that is both rustic and luxurious, which makes it, in my humble opinion, the best kind of camping of all.
By now I’ve convinced you that a canoe trip is in your future. But many men seem to find the idea of planning and executing a canoe trip intimidating. Loading a tent and sleeping bag in the car they can do. But heading down a river into the wilderness seems a bit more daunting. But it doesn’t have to be. Planning a canoe trip is like a planning anything, you’ll simply need to:
• Decide what you want to do
• Research what you need to know
• Find the resources you need
• Execute your plan
The following elucidations are true for small groups or individuals, but here I’m focusing on group dynamics as well.
Step 1: Decide What You Want to Do
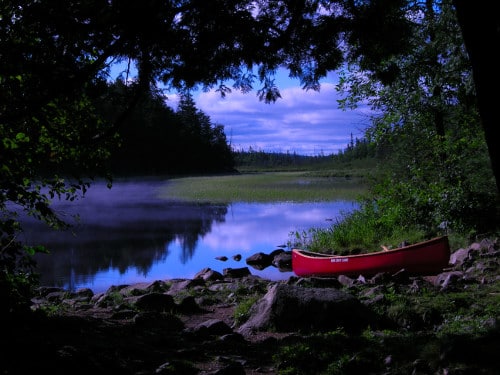
Where do you want to go?
Choosing the location is the first step, and it’s critical. It’s easy to romanticize getting into the wild on a month-long trip to the Northwest Territories with the guys from college, the ones you haven’t seen in ten years. Don’t. It’s not romantic. At least one person in your party will die a grizzly death. Not grisly, grizzly.
To start, shorter trips are better than longer trips. Flatwater trips are better than whitewater trips. Smaller bodies of water are better than larger bodies of water. Start slowly, or you may never start again.
Somewhere like the Boundary Waters Canoe Area Wilderness in the upper Midwest is a good place to start. That’s my turf and I love it. Out west, some of the classic rivers like the Missouri across the northern states, the Green in Utah, the Rio Grande in Texas, or the Niobrara in Nebraska are good starts. Blackwater rivers and swamps in the south are gorgeous, especially in the off-season. The Ozarks have some wonderful rivers like the Current. There are lots of places to go that are both beautiful and beginner-friendly.
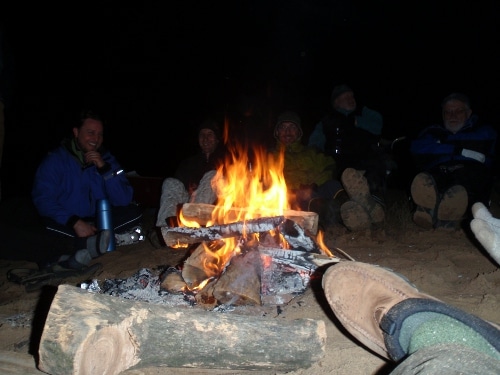
Who do you want in your group?
A friend of mine just went on a canoe trip. It was supposed to be a solo trip with a rendezvous in the middle of the trip. It didn’t turn out that way. My friend ended up hauling out a friend who had misrepresented his abilities. Friend was unprepared, wore the wrong clothing, went hypothermic and joined the Liar’s Club. It was a soul-sucking experience, not the rejuvenation he expected.
Then his truck broke down on the way home.
How do you avoid soul-sucking experiences? A good vetting process.
Select a trip that is suited to the person in your group with the least amount of experience, or if a lot of people are experienced and one is not, make accommodations (put him in a canoe with a very experienced paddler). Better yet, convince Weakest Link to stay home this time. That isn’t supposed to be humorous. No one will have fun if W.L. is holding everyone back.
Assign a trip leader early on, or at least a team, all of which are of one mind on the goals and expectations of the trip. The trip leader doesn’t set the agenda; the group does that. But early on, safety protocols are discussed and agreed upon by the group. When things vary from that protocol, it’s the trip leader who says, “No, we’re not cliff diving. We agreed on that early on.” A trip leader can also say,”I don’t feel comfortable with you swimming in the Lagoon of the Shrieking Eels.” Before the trip, all agree that the trip leader’s word is law. It’s a hard place to be, and it has challenged friendships, but ultimately it has to be that way. Rule by consensus doesn’t work in the wilderness.
Step 2: Research What You Need to Know
Once you have decided where you want to go, start collecting information. Maps, guidebooks, and online info is good, most of the time, but maps can be wrong, guidebooks out of date, and the internet is proof that even the dumbest person can present their opinions as facts. You don’t know who they are, their experience level, or the nature of their preparation.
Here’s a hint about internet information: Generally, the more they talk, the less they know, especially if they had a bad experience. There’s a local stream with mild whitewater that I paddle often, sometimes with friends with limited experience. There’s also a local who insists that it is a horribly dangerous river and anyone who takes beginners there is negligent. I get an earful periodically, on how reckless and uninformed I am. He had a bad experience a few years ago (he swam). It’s not about him; it’s the river’s fault.
The best information comes first-hand. Use the telephone. Talk to people. You’ll know immediately if they’re credible. My experience is that we love talking to people about our favorite places to paddle, giving tricks and landmarks that may not be on the maps or in the books. Why we do this is puzzling, because it takes people to our favorite places. But we love these places, and want to share them.
If you’re planning a trip in a National Park, Wilderness Area, Scenic River or any other government controlled land, including BLM land, the local rangers and authorities are more than happy to give you information that is credible, often with maps and links sent for free. Their job is to get you into their domain, and they often have gear lists and other gear hints. Which leads me to…
Step 3: Find Resources
You need the proper gear to be safe and comfortable. Some of this information may be available from your previous contact, but outfitters are a great resource too. If you have no interest in using said outfitter, don’t waste their time. They are in the business of outfitting, not being a free resource to people who won’t use their services.
For groups or first-timers, I would strongly consider using a guide or outfitter. This takes the burden of trip leader off one of the group, which is pretty sweet, and you have an instant expert who knows the area, the weather patterns, the local blueberry patch (this is key), and otherwise will enhance your experience.
Spread across a group, it’s a cheap expense and even experienced paddlers can enjoy this. I took a guided trip in Alaska a few years back with the whole family, and while we could have rented boats and done the trip ourselves, we used a guide service, and we didn’t have to lift a finger. We focused on enjoying the scenery, not cooking ramen under a tarp in the rain. Hint: it rains a lot in Alaska. Instead, we ate salmon and green salads, halibut steaks, and stir-fry. Worth every penny.

Choosing an outfitter or guide is easy, actually. This is where the internet is good. Customer testimonials are great, both on the outfitter website and in other places, and if you see ten great testimonials and one whiner, shun the whiner. My experience is that some people choose to be negative and miserable. His life is his own punishment.
Ask about safety records. Ask about the training of their guides. Ask how long they’ve been around. Ask about the kinds of groups they service. Ask about their equipment. In short, you can’t ask too many questions.
If you choose to go without an outfitter, local specialty stores can help you the best. As the owner of a local specialty store, I am biased. The difference between a larger box store and a specialty store is the depth of knowledge. A box store employee has heard of the Boundary Waters. Our Assistant Manager has been to the Boundary Waters 30 times. He knows what to wear, how to pack, what to eat, where to go, and what works and doesn’t work. It’s a common conception that specialty store prices are more than box store prices. Not true.
Don’t learn how to set a tent up in the dark when it’s raining. Nothing in your gear should have a price tag on it (a sure sign to me that it’s going to be a very long trip). Dry runs are critical. Set up your tent in the backyard a few times. Maybe do it once in the dark with a headlamp. Know your gear. Don’t find out an air mattress has a hole the first night you’re out. Don’t find out your camp stove doesn’t work below 40 degrees when you’re trying to boil some water. Don’t find out rain pants don’t fit over your regular pants during a downpour.
Okay. Dead horse successfully beaten.
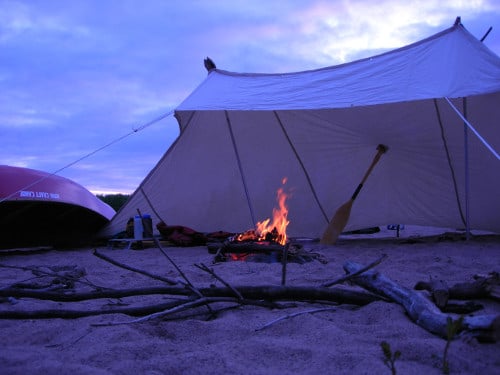
Step 4: Execute Your Plan
Of course, you’ve written down all this and have a plan, and you’re ready to go. A few last things to remember:
1) Leave a float plan with your family, friends, and local authorities.
If you are scheduled for three days and we’re coming up on day five, you want someone to know you’re behind. Not to worry them, but to allow locals to start searching. They generally don’t start for a few days after the return date, especially if the weather has been challenging.
2) Consider a PLB of some sort.
A Personal Locator Beacon is a nice little piece of insurance in the case of severe injury. Severe injury is defined as potential loss of life, limb, or eyesight. Cracking open a PLB because you’re cold and hungry will earn you a visit from a helicopter, and helicopter fuel is expensive. Unnecessary rescues tax the system, leaving people with real emergencies exposed, and unless you have a roll of hundreds (about 250 of them) you’re not fond of, avoid pulling the pin. Most PLBs have a “I’m okay” button, also called the DWH (“Don’t worry, honey.”) Pushing that button every morning sends a text or voicemail saying “I’m alive and loving it.” It can also send a link to Google Maps, showing exactly where you are.
For larger groups, a satellite phone is great, especially if the expenses are shared. I prefer PLBs because I don’t go the Spanish River to order a pizza.
3) There is water involved. Pack accordingly.
The odds of things getting wet is significantly higher on a canoe trip. This means you’ll want to protect your gear with something besides Hefty garbage bags. You can double them or triple them…but all it takes is one stray stick or an ember from your campfire and your waterproof system is severely compromised. The answer to this is dry bags, and lots of them.
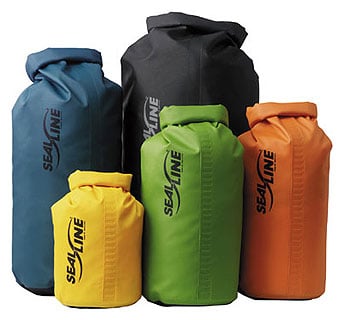 Dry bags are tough, and you can bet your sleeping bag they’ll be dry if used properly. Dry bags function with a roll top system, where you fold the mouth of the bag over itself and secure it with buckles. The two guidelines are, first, don’t fill them too full, as that makes the second guideline impossible. The second guideline is to roll the top down at least three times, and make sure the flaps are all lined up nicely.
Use lots of sizes and lots of colors. I am not so meticulous that I have a system for all my colors, but I do have certain bags that are color-coded. First aid is bright orange and I have written FIRST AID on the outside with a big Red Cross on it. If I am incapacitated, I want the dumbest person in my group to be able to find it. The other is color coded bright green, and it is the toiletries bag. Blue is often clothing, unless I have more clothing than I have blue bags. Your system may be different. I actually hope it is…do what works best for you.
Unless you want to carry everything in your arms, when you’re done packing everything that must be dry in bags or other dry storage, you move on to loading them up in your packs.
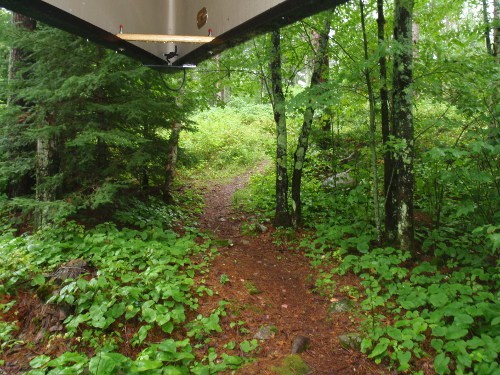
4) You will have to carry stuff.
Most canoe trips require a portage. This is pronounced either POOR-tuj (American pronunciation) or pour-TAJ (like in the Taj Mahal, the Canadian pronunciation). Some Americans are Canuckophiles and end up pronouncing it pour-TAJ, myself included. It just happened, eh? A portage is necessary when you either go from one lake to another, or along the side of a river when it becomes impassible, due to a rapid or a dam.
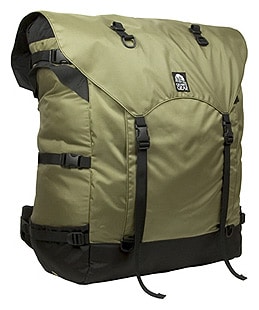 Portage packs are different than backpacks. A backpack is narrower, and may be taller and longer, usually with a really fancy suspension system that shows that its primary purpose is carrying stuff all day. Portage packs are usually larger, shorter, and have a less sophisticated suspension system. The idea is to carry a lot of stuff a relatively short distance. Considering the voyageurs of the fur trade era routinely carried two 80-pound bales of beaver fur, there is no sniveling here. Don’t complain about the weight, just suck it up. You’ll be happier later when you are baking your business in a reflector oven while you’re backpacking counterparts are enjoying their dehydrated beef stroganoff that looks like the dog just got sick on the driveway.
You will sometimes have to carry a pack and a canoe. If my then 16 year-old daughter can carry a 70-pound pack and a 45-pound canoe, so can you. Well…she is a rugby player and incredibly strong…even so…
5) The trails you will be on will be unlike most hiking trails.
Backpackers are mostly used to relatively defined trails. Canoeists are used to mossy boulders, spruce roots, irregular scree along a riverbed and other less-than-hospitable trails. Good footwear is essential on these sorts of trails.
What good footwear means is a religious discussion. Some prefer sandals with heavy soles (Chaco, etc.), some a sacrificial pair of always-wet boots, some use a specialized shoe with a neoprene sock that goes to the knees. My theory? You’re going to get wet, so plan on wet feet. I use a pair of hunting boots (Red Wing or Filson boots are great), usually the 12-14″ tall variety. Good wool socks. So long as you air your feet out periodically (usually at lunch and then dinner), you won’t get prune toes and your ankles with thank you.
I do take good care to make sure my boots are well cared for post-trip, and I do pull the insoles each night to let things air out. They go nowhere near a fire. Ever.
I anticipate comments that will tear my system to shreds. That’s fine. It has worked for me for 25 years. Experiment with your own system.
6) It’s easy to get lost.
In a place such as the Boundary Waters Canoe Area, the lakes are amazingly similar. Good map and compass skills are necessary, but so is deduced reckoning, often called dead reckoning. It consists of being aware of your surroundings and making sure that the thing that’s supposed to be there actually is. If the trail is supposed to be at the end of a bay and it’s not…consider for a moment you may be in the wrong bay. Do not forge ahead. Back up to where you last knew where you were. If that’s the put-in, so be it.
Even though the route is picked for you by the current, rivers are tricky too. Your ability to know how many miles you’ve gone is incredibly difficult. The bridge where you are sure you parked your car may look like a bunch of other bridges. You may think, “I should have been at the take-out by now,” only to find you passed it hours ago. This is where hitchhiking skills and begging come in handy.
GPS? Sure. It’s useful to know where you are and where you’re going. A GPS can also lead you down a path of surety that is not at all sure. Just because there’s a blue line on the GPS screen doesn’t mean the water is navigable, and it won’t show that the lake at that end is a mud pit when the water is low. And the water is always low.
Step 5: Have a Wonderful Experience
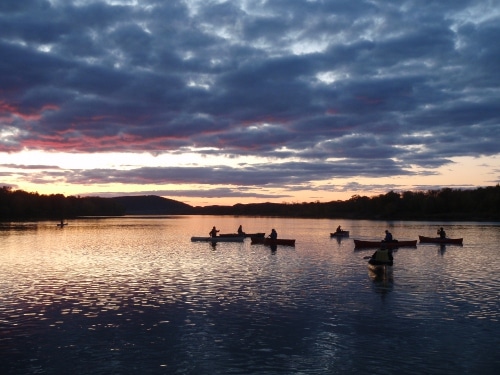
You’ve done your homework, so you’re confident and have no reason to fear. Fear comes from a lack of preparedness, so have a wonderful experience. Take only pictures, leave only footprints, and avoid Spam.
Have you ever been on a canoe trip? Share your tips and experiences with us in the comments!


