Editor’s note: This is a guest post from Creek Stewart of Willow Haven Outdoor.
As the East Coast of the United States recovers from Hurricane Sandy, aka “Frankenstorm,†the rest of us watch the unfolding aftermath from a distance – thankful Mother Nature hasn’t unleashed her fury on our doorstep today. Hurricane Sandy is yet another sober reminder that none of us are exempt from disaster. Mother Nature doesn’t discriminate. She doesn’t care where we live, what we drive, how much we make, or what we do for a living. Her antics are diverse and far-reaching. She has a recipe of devastation for all parts of the world: hurricanes, tornados, floods, wildfires, winter storms, earthquakes, tsunamis, droughts, heat waves, volcanoes, land-slides, and sometimes even a combo pack.
It is human nature to avoid potentially bad news. It is also human nature to procrastinate. Consequently, many of us avoid going to the dentist, taking our car in for routine maintenance, implementing a home security plan, getting our yearly physicals, and many other important preventative and preparative tasks. Unfortunately, avoiding the thought of potential bad news has absolutely no bearing at all on whether or not it will happen. In fact, this attitude is completely self-destructive. Avoiding preparing for or prevent a very dangerous and probable threat is irresponsible and incredibly foolish. Yet, people do it all the time when it comes to potential natural disasters. The mentality of “it’s not going to happen to me†is no longer an acceptable excuse. In the 15 years I’ve taught Survival and Preparedness courses I’ve come to the conclusion that there are no acceptable excuses and I have run thin on patience to those that offer them. Burying your head in the sand is not a strategy and depending on the government to save you is not a plan.
Many of you remember the article I wrote a while back titled How to Make a Bug Out Bag. “Bugging Out†is the decision to abandon your home in search of a safer destination in the event of a large-scale disaster. Sometimes, Bugging Out is not necessary nor is it the best decision. A disaster may, in fact, make it impossible to Bug Out. The alternative is called “Bugging In.†Bugging In or hunkering down during a large-scale disaster can present many challenges to a survivor. Oftentimes, the utilities we depend on are ripped off-line – known as “Grid-Down.â€
Disasters can devastate our most critical services including water supplies, medical facilities and first responders, waste and trash processing and removal, transportation options, fuel and grocery supplies, natural gas lines, electricity, phone service, and even public safety. A Grid-Down scenario can last for several days or even weeks. During this time, you must be able to provide basic survival needs for you and your family. These Bug In preps and plans need to be made in advance. They cannot be made in the heat of a disaster.
How Long Should I Prepare to Bug In?
That’s the question of the century! The government says 3 days. I have preps to get me through 1 year. My answer is a minimum of 2 weeks and then keep prepping for longer as time and money allow. Start with 3 days then work up from there. Don’t let this question prevent you from making progress.
What Are the Categories I Should Consider When Prepping?
Our basic human survival needs remain the exact same no matter where we are in the world or what circumstances we face. They will always be: shelter, water, fire, food, first aid, and self-defense. The order of priority may change, but the basic categories will not. Below is a brief breakdown of each category including several solutions to consider for a short-term Bug In scenario.
Shelter
During a Bug In scenario, shelter may seem fairly obvious. It is your primary place of residence. However, there is more to shelter than just a roof over your head. Shelter must protect us from the elements – even if access to modern utilities is limited or nonexistent. Shelter becomes your #1 priority in cold conditions. You must have alternative heating solutions in place just in case a disaster strikes during cold weather. Some excellent and affordable options are wood burning fireplaces, kerosene heaters, and portable propane heaters.
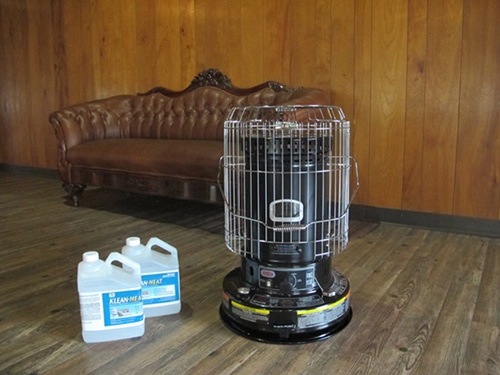
The back-up kerosene heater I keep at Willow Haven that will heat 1000 square feet for 11 hours on one tank of fuel.
Kerosene heaters can be purchased for just over $100 at virtually any home improvement store. My grandparents heated with a kerosene heater in their living room most of my life. They don’t require electricity and are very easy and safe to operate. Some countries use kerosene heaters as a primary heat source, in fact. The fuel (kerosene) also has an extremely long shelf life – I’ve heard of 20-year-old fuel burning just fine, and I’ve personally used kerosene that’s been sitting for 5 years with no issues. Above is a photo of a back-up kerosene heater I keep at Willow Haven that will heat 1000 square feet for 11 hours on one tank of fuel.
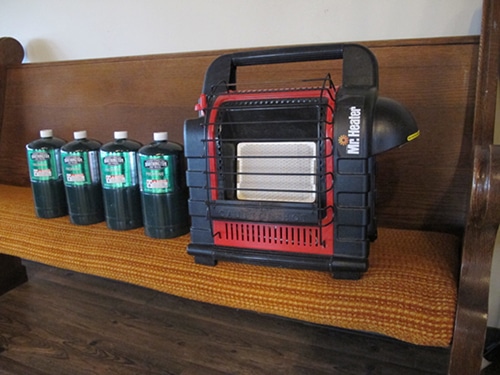
A small propane heater can last 4-6 hours on one tank.
For smaller spaces or supplemental heat, portable emergency propane heaters are excellent little solutions. Mine photographed above takes a one-pound propane canister that is available at most camping and home improvement stores. It really puts out the heat and lasts a surprising length of time (4-6 hours) on one tank. Extra propane canisters are easy to store as well.
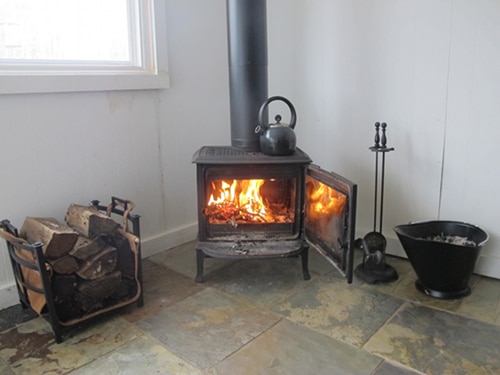
I had the wood burning fireplace pictured above installed in my home for about $1500. Even a small stove like this one will heat 1000 square feet of space to a comfortable temperature in freezing conditions for as long as you have wood to burn. If you opt for a fireplace, choose one that can also cook and boil water. Multifunctional uses are always a survival plus. The brand I have is Jotul though there are many excellent brands on the market.
Below are some other home (and car) heating tips I’ve collected from personal experiences testing my preps:
- Close off certain rooms of your house and ‘move in’ to the room with the heat source. Close doors or hang blankets to zone out other areas.
- Hang blankets in front of large windows to reduce heat loss.
- Have good blankets and sleeping bags on hand to help keep you and your family warm.
- Just one candle can warm the inside of a freezing car as much as 8 degrees.
Action Steps:
- Decide on an alternative heat source
- Buy it / install it
- Test it to calculate how much fuel you need for your chosen prep period
- Stock up on fuel
Water
This summer we had the worst drought in over 100 years here in Indiana. It sucked my well dry for over 2 months, and I had to live on my water storage. It wasn’t fun, but really put my back-up plans to a test. Whether you use a well or depend on municipal water service, a disaster can put a stop to your flow of fresh drinking water. Without water you can die in as little as 3 days. The best short-term Bug In water solution is to simply store extra water in your place of residence. You can buy commercially bottled water by the case/gallon or you can bottle and store your own water in food-grade containers.
A very popular do-it-yourself water storage solution is repurposed 2-liter pop bottles. Below is the process I use (I don’t drink soda but friends and family members are happy to give me their empty bottles):
- Step 1: Wash each bottle using water and dish soap.
- Step 2: Sanitize each bottle and cap inside and out with a bleach solution (1 teaspoon bleach mixed in 1 quart water). You can use this same solution to sanitize other types bottles. Rinse the sanitized bottle with clean water.
- Step 3: Fill each bottle with tap water. Add 2 drops of standard unscented household bleach (4-6% sodium hypochlorite)
- Step 4: Empty and refresh your water storage once each year.
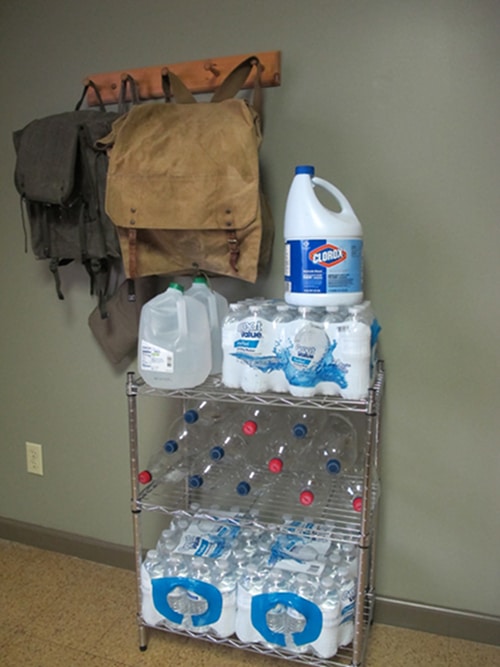
There are countless water storage solutions available ranging from fancy interlocking containers to 55-gallon drums. You’ll have to choose a solution that is right for your environment, budget, and consumption needs. Always store your water in a cool place away from full sun exposure.
A few additional emergency water storage tips:
- Keep a few gallons of unscented household bleach on hand at all times. This can be used to purify water and for other sanitation needs.
- A 55-gallon rain barrel used to collect water from your gutters is really easy to install and only costs about $100. You can make your own for even cheaper.
- Your hot water heater contains many gallons of emergency water storage. All hot water heaters have a drain valve at the bottom. This water does not need to be purified.
- In the event of a large-scale disaster, fill your bathtub(s) with water as an extra precaution. This is bonus water if your supply is threatened.
- Pets? They need water too – don’t forget to store water for them.
- If it’s yellow let it mellow, if it’s brownflush it down.
- One gallon of water per day per person is a good rule of thumb for water storage.
Action Steps:
- Decide whether you are filling your own containers or if you are buying commercially bottled water
- Calculate how much water you need (one gallon x people in household x days in your chosen prep period)
- Stock up
Fire
During a Bug In scenario, fire represents two categories: warmth (which we’ve covered) and cooking. You’ll see in the next section that I recommend your emergency meals be very simple to prepare, requiring no cooking at all, if possible. However, it’s important that you have an alternative cooking solution in place to cook meals and boil water if necessary. Several affordable and turn-key off-grid options exist. I’ve listed a few below in no particular order.
Solution # 1: Fireplace or Wood Burning Stove
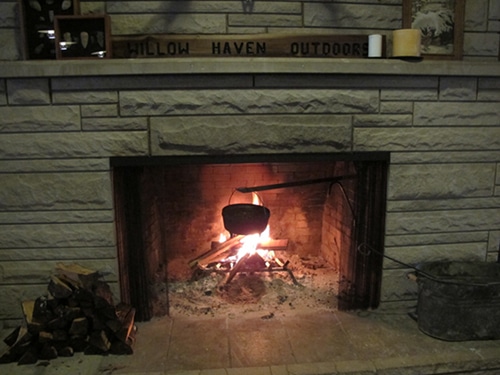
Not all wood burning stoves can be used to cook meals or boil water. If you are installing one, be sure it can do both. Even an open concept fireplace can be used to cook and boil water. I installed a metal swing arm in the fireplace at Willow Haven that can hold pots and kettles over the open flame. This is an excellent cooking solution.
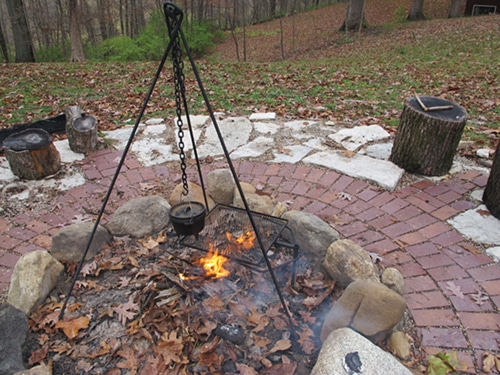
Even an outdoor fire pit can be an efficient means of cooking or boiling water. A tripod and swing-away cooking grill make these tasks much easier.
Solution # 2: Good ‘Ol BBQ Grill
Now this isn’t even roughing it! However, you can’t cook on the grill if you don’t have a propane tank or charcoal. Always keep an extra full propane tank (or two) or several bags of charcoal on hand if you choose a BBQ grill as your back up cooking solution. Both store long-term very well.
Solution # 3: Natural Fuel Rocket Stoves
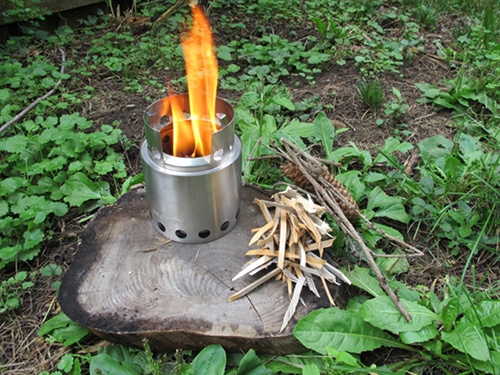
Solo Stove works really well for one-pot meals for one or two people.
Rocket stoves have come a long way in recent years. They are incredibly efficient and can operate on a variety of natural fuels such as sticks, twigs, pinecones, charcoal, and other biomass. Above is a photo of a small version from Solo Stove that works really well for one-pot meals feeding one or two people. You can literally cook an entire meal with a little pile of twigs and sticks.
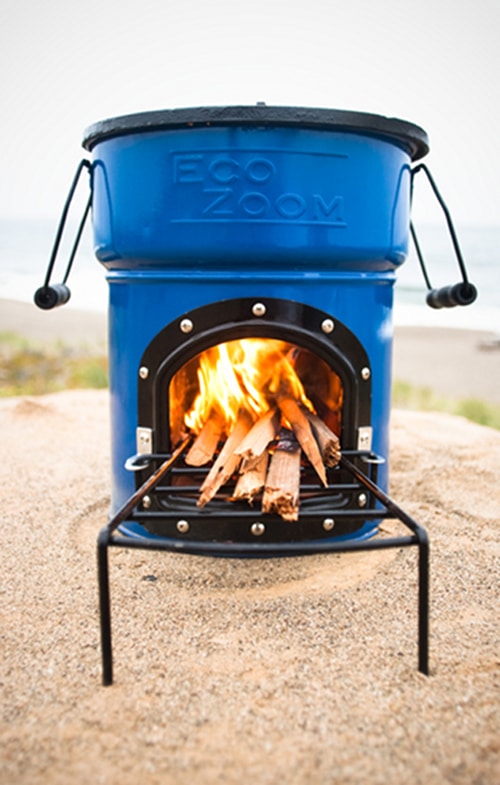
The EcoZoom stove is also a great off-grid alternative that can burn small sticks and split wood for fast efficient cooking.
The EcoZoom stove is also a great off-grid alternative that can burn small sticks and split wood for fast efficient cooking. The cooktop can accommodate big pots when cooking or boiling for larger groups of people.
Solution # 4: Camping Stoves

The MSR Pocket Rocket Stove is what Creek keeps in his Bug Out Bag
Your options are endless when it comes to lightweight camping stoves. They are all fuel dependent so you will need to stock applicable fuel canisters if you intend to use this option for more than a few meals. They are also designed to cook for one or two people at a time versus a large group.
Regardless of which cooking stove you choose, make sure you have the necessary metal cookware, pots, and utensils to both cook meals and boil water in an emergency.
Action Steps:
- Choose an off-grid cooking solution that best fits your needs and budget
- Stock up on fuel
- Make sure you have metal cooking pots and pans that fit your stove choice
Food
Our food supply is dependent on a myriad of factors. When disaster strikes, it screws with pretty much all of these factors. 99% of the food you see in a grocery store is on the shelf. Their back rooms are filled with empty cardboard boxes. The food arrives on a truck and is immediately stocked on the shelves. If it’s not delivery day, guess what? No milk and bread today – that’s what. But you won’t have to worry about that because you’re stocking your own shelves in advance.
Think “open and eat meals.†Ideally, your emergency food rations will consist of meals that require little to no preparation. Boiling water for reconstitution should be the most complicated step of any emergency food ration. Your food preps should also have a long shelf life and not require refrigeration. There’s no sense in stocking your shelves with fresh vegetables that are going to rot in a few days or with frozen dinners that will go bad without electricity. It’s very easy to overcomplicate food storage. Keep it simple! Below are a variety of emergency food storage options.
Food Storage Option # 1: Freeze Dried/Dehydrated Meals
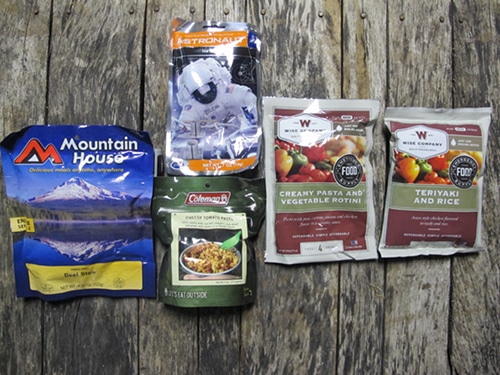
Many dehydrated meals have a 10+ year shelf life.
These meals are easily reconstituted with hot water. You can eat most of them in the pouch they come in. And, many of them have a 10+-year shelf life. This is a really easy and nutritious food storage option. Some reputable brands are Mountain House, Wise Foods, and Backpacker’s Pantry.
Food Storage Option # 2: Military Meals Ready to Eat (MREs)
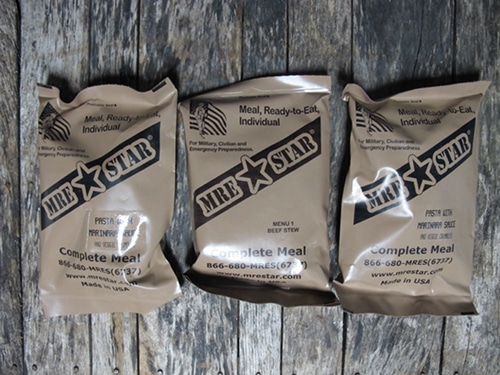
MRE Star. Editor’s Note: In the McKay household, we’re partial to MREs from Emergency Essentials.
MREs are packed with calories – they are designed to fuel soldiers in the field. They are also easy to prepare, often coming with their own little chemical “just-add-water†heating element. And, they have a long shelf life.
Food Storage Option # 3: Store-Bought Canned Goods/Packaged Foods
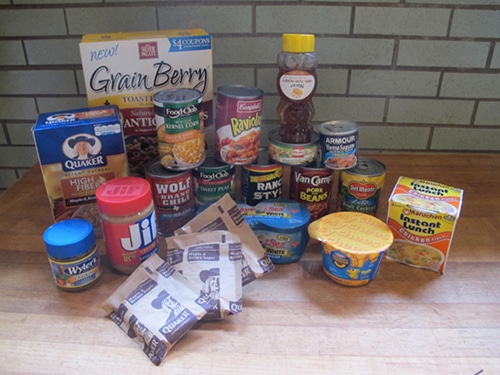
Add a few cans to your grocery list each week and you’ll be surprised at how fast a small stockpile will develop.
Canned goods make great survival meals. Most of them can be eaten cold right out of the can. Just keep tabs of the expiration date and use them up before they go bad. From soups to vegetables to tuna and chicken, the options are endless. Add a few cans to your grocery list each week and you’ll be surprised at how fast a small stockpile will develop.
Food Storage Option # 4: Can Your Own Food
You can also can your own fresh fruits, vegetables, and meats. This is more labor intensive but is a great way to preserve items from a garden or extra meat from a large-game hunt. Growing up we had canned vegetables from the garden all winter long and they were delicious.
Food Storage Option # 5: Hunting, Farming, Gardening, and Gathering
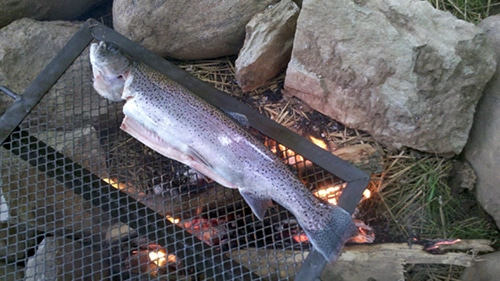
For extreme long-term survival scenarios some basic hunting and gathering skills can go a long way. Depending on the season and time of year, wild animals and plants can be very viable meal options. You’ll need to know how to clean and dress wild game as well as how to identify wild edible plants, so further training is advised. Small game animals such as squirrel, rabbit, and fowl make excellent survival meals. Learn how to field dress a squirrel here. I have a pond at Willow Haven that I like to call my long-term food storage solution. Fresh caught fish make easy survival meals and require zero maintenance.
Growing your own fruits and vegetables can also supplement other food storage you might have. Even apartment dwellers can grow impressive container gardens with limited space. Fresh herbs can easily be grown in windowsills or on balconies. You can store root vegetables and apples all winter long in a cool basement or cellar.
Other more self-sufficient options include raising animals such as goats, rabbits and chickens. I’ve found raising backyard chickens to be a very fun and productive hobby. They are low maintenance and keep me in fresh eggs year-round. And, they could care less if the natural gas or electricity is flowing.
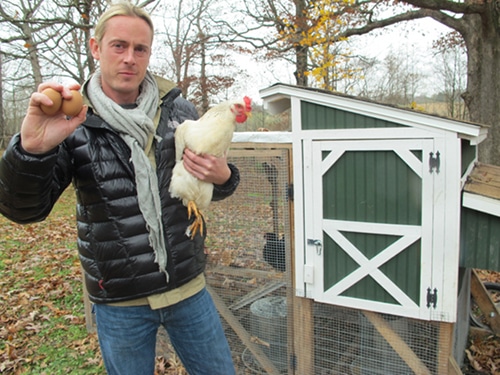
Raising backyard chickens to be a very fun and productive hobby. They are low maintenance and keep you in fresh eggs year-round.
Food Storage Option # 6: Mix & Match
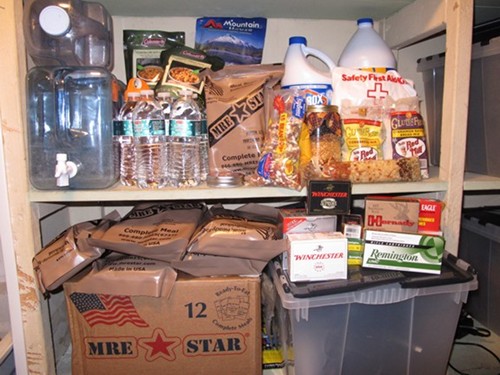
One of Creek’s storage shelves.
Mix and match the above options for a very well rounded food storage solution. Other great food storage options include rice, dry cereal and granola, powdered milk, energy bars, and beef jerky. Your food storage doesn’t have to look like a well-organized grocery store shelf like you see on those prepper TV shows. It can be crazy-looking like this picture of one of my storage shelves above.
What About My Refrigerator and Freezer?
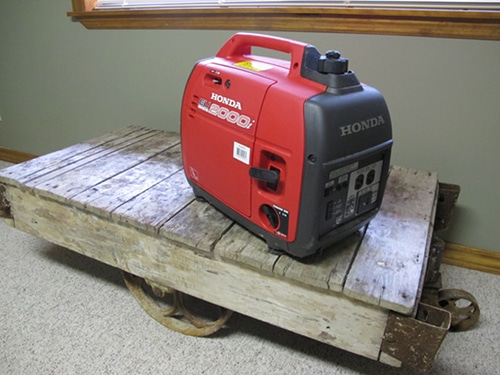
Well, unless you have solar, hydro or wind power (which most people don’t), you’d better start eating the stuff in your refrigerator and freezer first. If it’s below 40 degrees outside you can just put the contents on your back porch. Or, you can pick up a generator for a few hundred bucks. If you choose to buy a generator you will also need to consider fuel storage. I do have a back-up generator to run my refrigerator and power a few miscellaneous electronics. I’ve found that running a generator in a “2 hours on – 4 hours off†cycle makes best use of fuel. Keep a thermometer in your fridge. If it rises above 40 degrees for more than 2 hours then throw any perishable food away.
Other Emergency Food Storage Tips:
- Do you have a manual can opener? Get one!
- Don’t forget your special dietary needs.
- Infants? Stock up on powdered formula.
- Pets? They need food too.
Action Steps:
- Choose a food storage solution (or combination)
- Start building your stockpile
- Routinely check expiration dates and rotate in new stock when necessary
First Aid
You may not be able to leave your house. Hospitals and pharmacies may not be open. Heck, medical supplies may not even be delivered to your area for a few days.
The most important facet of this category is prescription medicines. If you or a loved one is dependent on some kind of medicine then you need to have enough on hand to get you through a short-term Bug In disaster. Explain to your doctor that you are preparing an emergency kit and you would like to have an extra refill for that kit. If he/she denies you, I’d say get a new doctor who is like-minded in these matters. These medicines need to be monitored and rotated just like food.
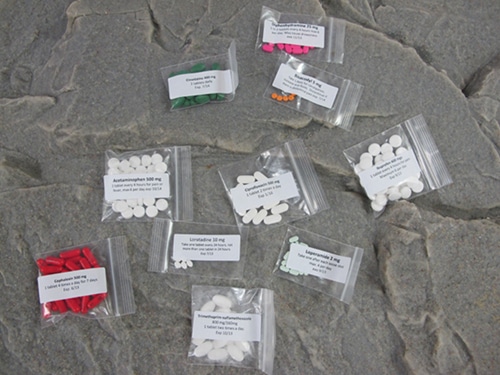
In addition to prescription meds, you need to beef up your first aid preps as well, and even consider taking a local first aid course through the Red Cross. I own an emergency first aid kit from Alaska-based MedCall Assist and it’s the best I’ve seen. If you build your own I’d suggest using their kit as a guide. It is a very thorough and well-thought-out disaster preparedness medical kit.
Other tips for first aid issues:
- Does anyone have severe allergies? Do you have an EpiPen?
- Pets? Do they have medications?
- Don’t forget extra contacts/eye-glasses/solution.
Action Steps:
- Get some back-stock on important medications – have a conversation with your doctor
- Beef up your first aid supplies
- Consider taking a basic first aid course from the Red Cross
Self-Defense
Disasters create abnormal circumstances. First responders (and public safety) are always overwhelmed. Response times are always delayed. 911 is always inundated with calls. Phone and internet services (land and cell) are often interrupted. Disasters can drive good people to do things they would not normally do. Disasters also have a tendency to embolden and empower existing criminals as well.
The importance of self-defense is often overlooked in disaster preparation. Unfortunately, it is an aspect that must be considered. Violent crimes increase during large-scale disasters. Some people further exploit disaster victims under the cloak of chaos and disorder. Whether driven by desperation or greed, it is the darkest side to every disaster.
Self-defense comes down to two basic categories: Home Security & Self-Defense Tools and Training
Home Security
Simple and inexpensive upgrades to your home’s security can be very effective in preventing successful break-ins during disaster scenarios. A few basic upgrades can include:
- Solid metal or wood doors – no decorative glass.
- Dead-bolt on every outside door.
- Consider an inside mounted door bar for added security.
- “Beware of Dog†sign even if you just have a cat or goldfish. Criminals are looking for easy targets.
- Upgraded door hardware with deep-set 3†screws.
- Exterior motion lights (solar-powered) – front and back.
- ‘Defensive’ rose bushes below each ground-level window.
- Upgraded window locks / cut wood-block stoppers for inside.
- Well-advertised video alarm system – whether you have one or not.
Self-Defense Tools & Training
Guns are the obvious home defense weapon. The type is a personal choice. I prefer shotguns. Regardless of what type of gun you choose to own, it can be more of a liability than an asset if you don’t know how to use it. Firearms training and practice are crucial elements to gun ownership and effective self-defense. Other inferior self-defense tools include pepper spray and stun guns.
Action Steps:
- Make necessary upgrades to home security
- Decide on a home self-defense weapon
- Train and practice with your weapon of choice
- You can’t shoot without ammunition
Two Things Many People Forget
1. Know how to turn off your utilities. Disasters have a way of damaging electrical lines/circuits, gas lines, and water lines. If yours are affected you may need to turn them off. The crawl space in my house once filled with water during a large-scale flood. I had to shut off the electricity to my house to prevent a very dangerous situation. Make sure you have the proper tools (and knowledge) to quickly and safely disconnect all of your utilities.
2. Disasters can also affect sewage systems and trash removal. When that flood I mentioned happened, I could not flush my toilet. The flood water had completely filled my septic tank. Store extra heavy-duty trash bags to contain human waste and trash just in case. It’s important to maintain a very sanitary bug-in environment. A 5-gallon bucket lined with a trash bag makes a suitable makeshift toilet.
Conclusion
There are many facets to consider when preparing for a potential Bug In. While this is not an exhaustive list, it is a great place to start. There are countless people on the East Coast right now wishing they had prepared just the basic necessities for the uncertain days or even weeks ahead. This is the unfortunate truth after every disaster – regardless of type, size, or location. As of this writing over 4 million people are still without power from Hurricane/Storm Sandy, and some may not have it restored for another ten days. It’s easy to let life get in the way of preparing for the future. Ironically, though, our future is shaped by the things we do (or don’t do) today.
Be sure to listen to our podcast with Creek on bugging in:
____________________
Creek Stewart is a Senior Instructor at the Willow Haven Outdoor School for Survival, Preparedness & Bushcraft. Creek’s passion is teaching, sharing, and preserving outdoor living and survival skills. Creek is also the author of the book Build the Perfect Bug Out Bag: Your 72-Hour Disaster Survival Kit. For more information, visit Willowhaven Outdoor.


