I was in Chicago at a networking event three years ago and found myself with a problem.
The dress shirt I was wearing had apparently “shrank” in the neck as I couldn’t get it to button-up all the way to the top. Although I could normally skip the tie, this event was more formal and going without neckwear was not an option. What was a man to do?
With 30 minutes to spare, I went to the hotel lobby and asked for an emergency sewing kit. 5 minutes later I was cutting off the offending button and within 5 more minutes had moved it 3/4 of an inch. It was still a bit tight, but the shirt buttoned much more easily, and I made it through the event without a problem.
So the question today is: do you know how to thread a needle and how to sew on a button? You might think that sewing is “girly stuff,” and rely on your mom or wife to replace your buttons for you. But you never know when you’re going to be on your own and need this skill in a pinch; knowing how to sew on a button is a small way of making yourself more self-sufficient.
If you don’t know how to sew a button, but want to learn — below I’ll explain how to professionally sew on a button in 5 simple steps.
FYI, if you’d like more quick style fixes read through this classic AOM article.
Tools You’ll Need:
- Needle (2 if possible) – any basic sewing needle will do, the slimmer the better.
- Thread – you’ll need about 12″ to do the whole process. If you double your threads over (a bit stronger and easier to knot), use 24″. Try to use a thread that matches the garment color, but in a pinch, black or navy are unobjectionable.
- Button – the original, if possible, otherwise simply use what you can find. Most shirts will have a spare set of buttons sewn on the inside of the bottom front. Note: some buttons have two holes, others have four. The method here is for a four-hole button, but can be adapted to two-hole buttons as well.
- Cutting tool – Scissors, knife, or something sharp to cut the excess thread. You can use your teeth in a pinch.
If you’re traveling and don’t have the above supplies, ask the front desk at your hotel for an emergency sewing kit. They’ll very often have one to give you. But because you never know where and when one of your buttons will pop off, I recommend always packing your own emergency sewing kits in your bag and car, as I explain below:
How to Sew on a Button
Take off the garment if possible, although in my story above I simply performed the procedure in front of a public restroom mirror. If working on your front trouser button, find a bathroom stall.
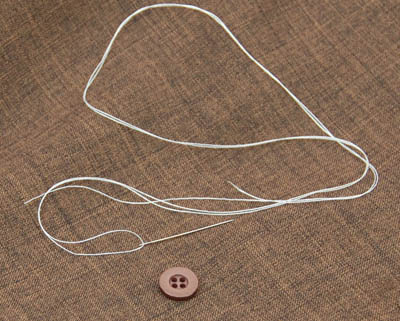
Step 1: Thread the Needle & Knot the End
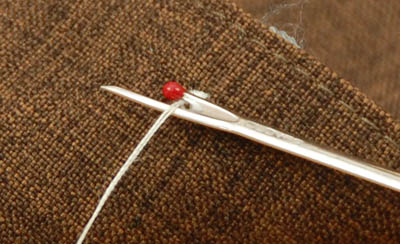
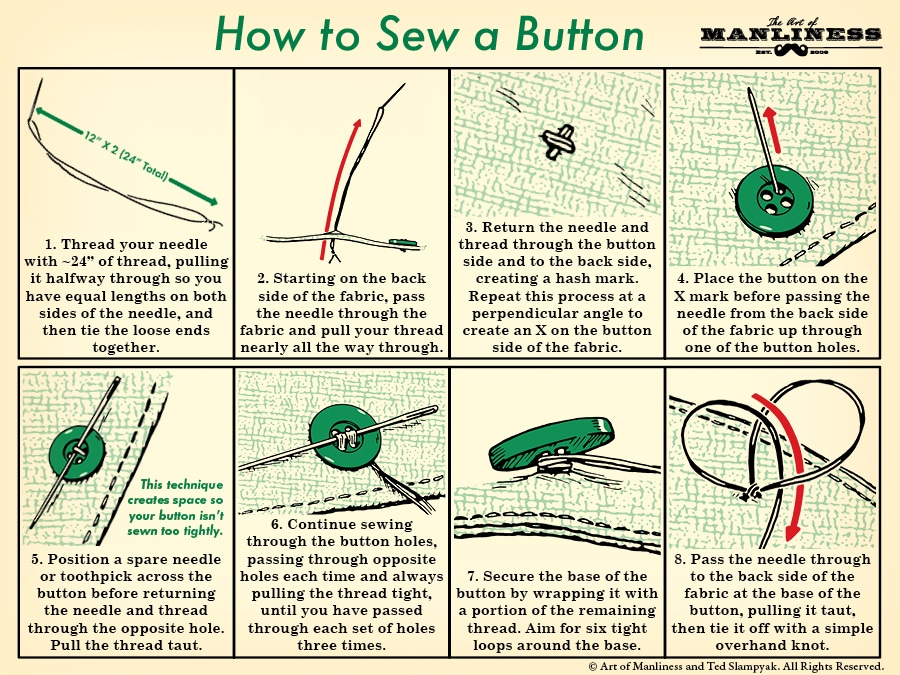
How much thread do you have? If you have 24 inches go ahead and “double over,” which means sliding the thread through the eye of the needle and then doubling it over until you have equal amounts on either side. You want at least 12 inches to work with. A doubled-over thread can just have the ends knotted together in a basic square knot, or you can use the same method as a single end.
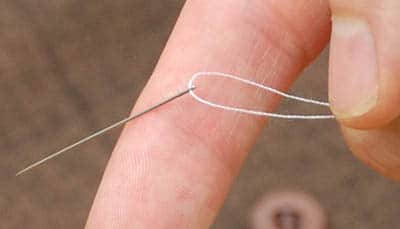
If you have less than 24 inches of thread, you’ll have to use a single thread. Slip a bit of slack through to tie it off with. An inch or two should be plenty of slack, but use as much as you need — you’ll pull it all back in the next step. To tie off the back end of a single thread, you can either tie a few small overhand knots, or you can just wrap the thread around your forefinger several times. Roll the loops into a tight bundle with your thumb, then slip the whole bundle off your finger. Grip the bundled loops with one hand and tug the long end of the thread tight with the other. This should pull the loose bundle into a tight knot.
In either method, once the knot is tied it’ll be used as the first anchor to help keep the thread from coming loose.
Step 2: Create Anchor “X” Point
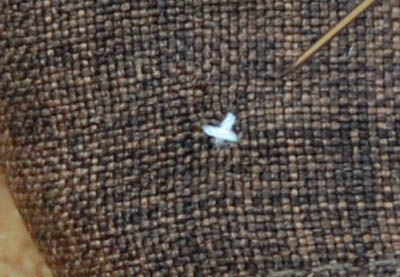
Starting at the back end of the fabric, run the needle through to the front where the button is going to be needed. Run the thread through to the back, and then again back to the front. You want to create a small “X” where the button will be centered. This X is also the reinforced anchor for the thread to ensure it doesn’t loosen during stress.
Step 3: Position the Button
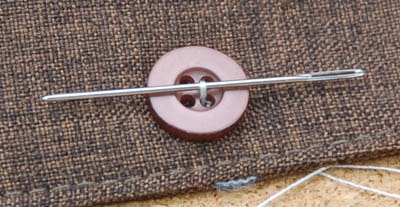
Put the button on the anchor “X” and begin sewing by pushing the needle from the back to the front through the first button hole. At this point you want to add the spacer (a second needle or a toothpick, pin, or small stick can be used).
Push the needle up from the underside of the garment and through one of the holes on the button. Pull the thread all the way through until the knot snugs against the underside of the fabric. Use a fingertip to keep the button in its place.
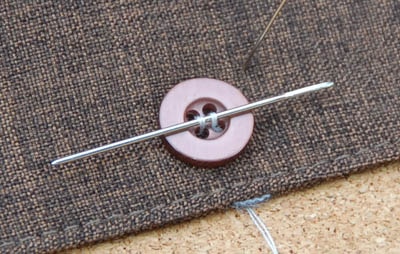
Turn the needle around and push it back down through the hole opposite the one you came up from. Push it all the way through and tug the thread tight. You should be left with a single small line of thread across the button, connecting the two holes.
You’ll repeat this process for six passes, three for each set of holes on the button.
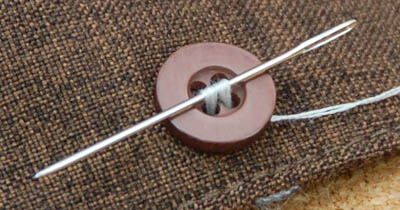
Step 4: Create the Shank
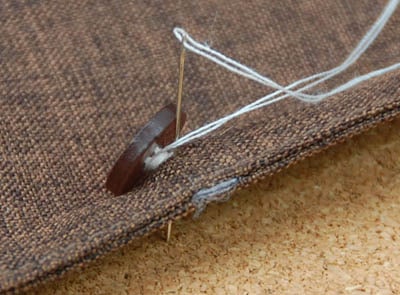
On your last repetition of the previous step, come back up through the fabric but not through the button. Come up like you were going to go through the usual hole in the button, but turn the needle aside and bring it out from underneath the button.
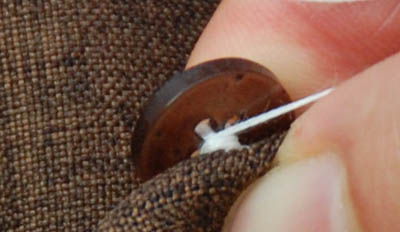
Use the needle to wrap your thread around the threads beneath the button. Make six loops around the bridges of thread that connect the button to the fabric, behind the button itself.
Pull tight and then dive the needle back into the base to be tied off on the other side of the fabric.
Step 5: Tie It Off
Make a small knot on the back side of the fabric. You can use the needle to guide the thread through a knot or you can snip the thread off the needle and tie the knot in the slack with your fingers, but either way you want it snug up against the back of the fabric.
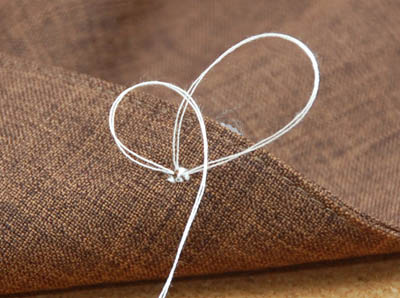
Probably the easiest knot to tie off is a simple overhand loop tied with the needle still attached. Pin the thread down right against the back of the fabric, under the button, then make a little circle in the thread just beyond your fingertip and pass the needle through the circle. Tighten it down and then cut off the excess fabric.
These directions can be used on shirt buttons, suit buttons, or trouser buttons. Hopefully you can put this to good use!
If you would like to watch this in video form, here is a short 4 minute video explanation:
__________________________________________
Written By:
Antonio Centeno
Founder – Real Men Real Style
Creator of the internet’s most comprehensive style video library


