Editor’s note: This is a guest post from Tuck Oden.
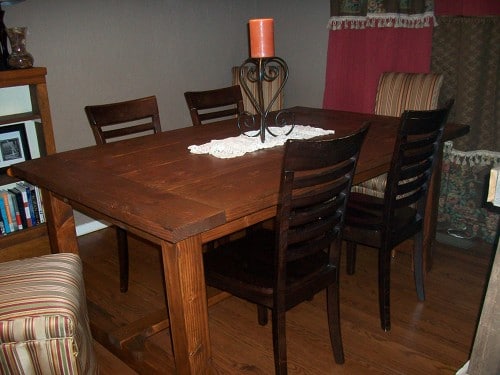
If you’re like me, every time you wander through a big-box furniture store, you feel a little insulted. Here you are, a man, staring at relatively simple furniture, being asked to lay down large sums of money for a bookshelf, dining set, or desk. And if you know enough about wood to spot laminate and fiberboard, you’ll quickly see these expensive pieces of furniture have a shelf life (no pun intended) of about two years.
Today I want to show you a project that’s within your reach if you have a few tools, a couple weekends, and the courage to take on something new. If you’re completely new to woodworking, this may be a little ambitious, but if you’ve got a little experience, you shouldn’t encounter too much trouble. Keep in mind that I’m an amateur. I took shop class in high school and have done a few little projects here and there, but I’m certainly no pro.
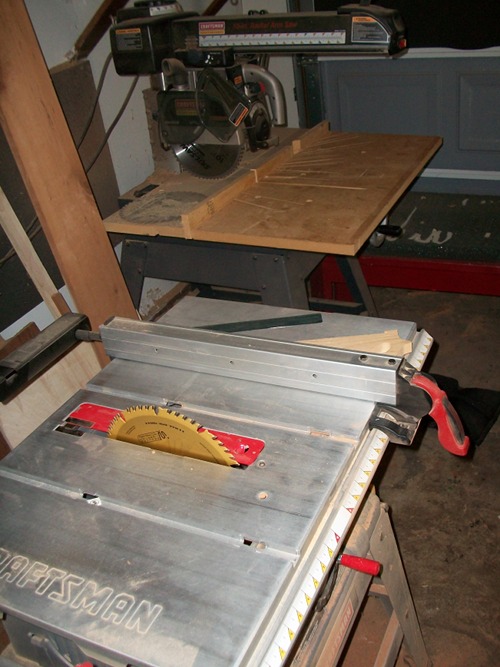
My two primary pieces of machinery: 10″ Craftsman Table Saw and 10″ Craftsman Radial Arm Saw
The result of this project is what your wife or girlfriend would call a “Rustic,” “Barn,†or “Ranch Style†dining room table. I call it a man table, because it’s made from inexpensive wood, can take a beating, and one day your grandchildren will be serving their kids Thanksgiving dinner on it. Being the man that built that table is, well, manly. I’ve found a few similar tables on Craigslist and furniture sites, starting at around $1200. That’s absurd. I built mine for less than $200, including the chairs I bought for it.
I started by doing some searches around the ol’ internet to find other folks who’ve built their own tables. Using the images and information I found, I started drawing up plans. My table is approximately 6’x44″x31″ (LxWxH). You may find different dimensions work better for you (31″ is pretty tall)–so make your plans however you like. I also built leaves that make the table 8.5’ long.
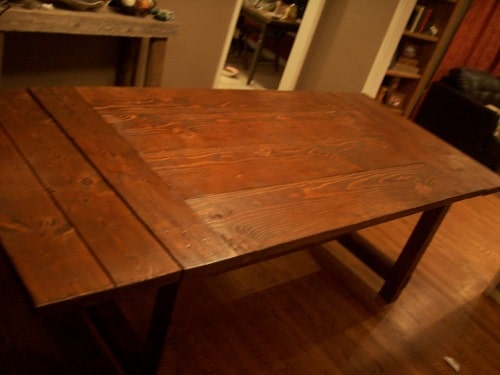
Leaves and All for Fall
What You’ll Need
Shall we get started? This is going to look far more expensive and complicated than it really is. Have no fear. This took two weeks from start to finish (while working full-time). Here’s what you’ll need:
Tools:
- *Table Saw – for ripping to width and cutting the notches for the legs and leaves.
- *Radial Arm Saw – for cutting to length (or, if you plan well, you can get the fellas at Lowes or Home Depot to cut your pieces to length and forgo the radial arm saw).
- Chisel – for chipping out the notches. A flathead screwdriver would also work.
- Hand-held Belt Sander – you’ll end up using this all over the place.
- Drill/Rechargeable Screwdriver – I used my heavy drill for drilling holes and a rechargeable screwdriver to drive screws.
- Pocket-Hole Jig – this is indispensable. Nearly every joint on this table uses pocket holes.
*You may be able to use a circular saw instead. I don’t have any experience working with these though.
Misc:
- Stuff to ‘distress’ the table–we used chains, hammers, screws, sparklers, matches–anything that can leave a mark.
- Stain, brushes, and paint thinner–we used Rustoleum Ultimate Wood Stain, Dark Walnut. But we did it wrong. More on that later…
- Polyurethane (to protect your finish).
- Black Spray Paint for the lag screws and washers.
Lumber:
We used cheap construction grade (douglas fir) lumber. Your amounts may differ, but keep in mind these usually come in lengths starting at 8′:
- 4″x4″x8’s – 3
- 2″x8″x8’s – 3
- 2″x12″x12’s – 2
- 2″x4″x8’s – 4
Hardware:
- 3/8″ x 6″ Lag Screws (spray-painted black) – 8
- 3/8″ x 3″ Lag Screws (spray-painted black) – 8
- 3/8″ Washers (spray-painted black) – 16
- 2 ½” Pocket-Hole Screws – approx 100
- 1 ½” Pocket-Hole Screws – approx 100
- Brackets – 10
Draw Up Your Plans
The first step is to draw up your plans. I should mention that lumber sizes are a lie. They’re typically about ½” less in every dimension than what they’re called, so a 2″x4″x8′ is actually 1 ½” x 3 ½” x 8’ 11 ½â€. Remember this when you’re drawing up your plans.
Drawing plans is a good way to make sure you understand everything you’re getting into. Draw them from every conceivable angle and think through how you’re going to make each cut and joint.
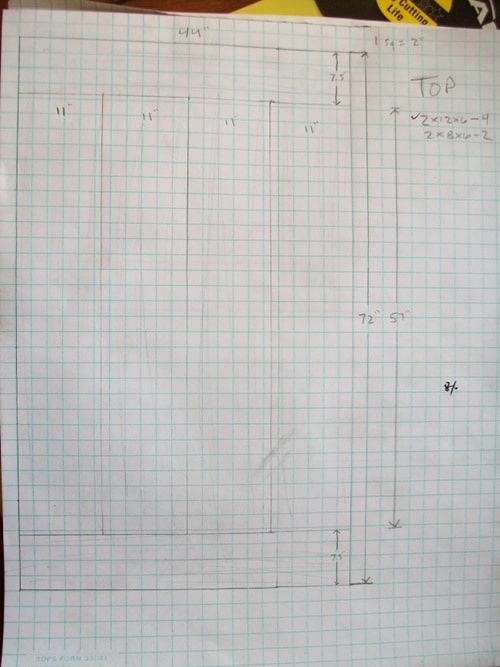
Top
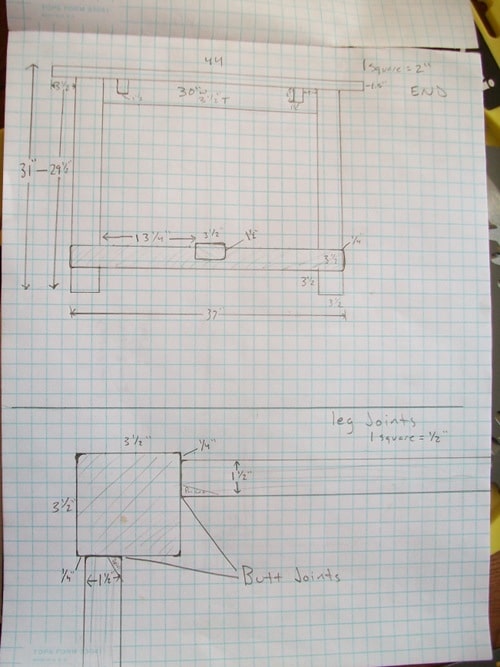
End view and top view of the rail-to-leg butt joint. Don’t giggle. That’s what it’s called.
A Few Things to Keep in Mind:
- Allow about 23″-30″ in width per place setting.
- Allow 12″ depth for each place setting, plus 6″-20″ for the center of the table.
- Keep your dining room’s size in mind–you need at least 32″ between the back of each chair and the nearest wall or piece of furniture.
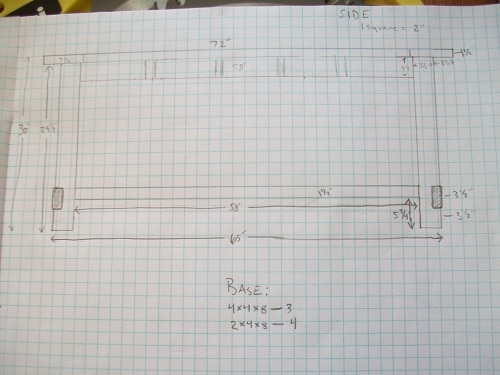
Side view
Get Your Lumber
Now that you’ve got your plans worked out, you need to determine how much lumber you need and go pick it up. You do have a pickup, right? RIGHT? Check every board for bows by looking down the length of it. Bowed wood is going to give you a lot of trouble, so get the straightest boards you can find.
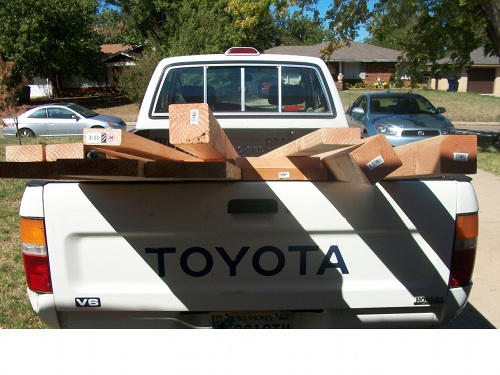
It seems like a lot of wood, but all of the lumber needed for our table was less than $100.
Cut Your Wood
Your next step is to either get the guys at the hardware store to cut your wood for you, or do it yourself. Mark your lengths and go to town!
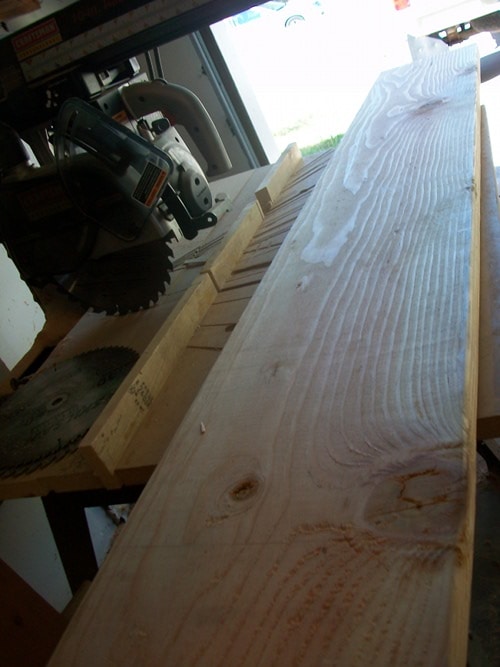
Ready to attack a 2×12 with the radial arm saw.
Be sure to label each piece as you go so you don’t get confused later.
Here’s an old woodworking adage I enjoy ignoring: “measure twice, cut once.†Honestly, I measure nonce and cut thrice. I often eyeball it. I use pieces I’ve already cut to measure what I need to cut. It’s not a great habit, but I prefer it to measuring everything. And the results usually aren’t that different. At least that’s what I tell myself. I ended up having to sand down the ends of the 2×12’s running the length of the table (where they meet the aprons) because they weren’t exactly the same length.
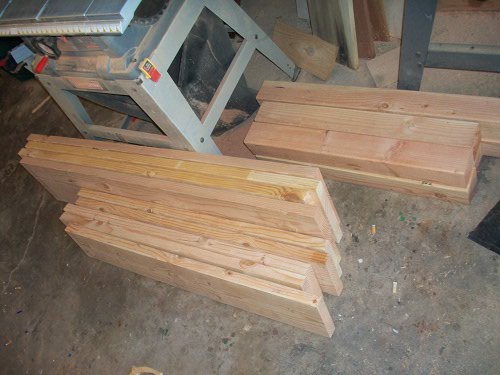
Pieces cut to length. From bottom to top this is aprons/leaves, tabletop length pieces, legs/crossbeams and rails.
Design the Table Top
Now that you’ve cut everything to length, it’s time to decide how you want to arrange the pieces for the top. Lay out the pieces and figure out which arrangement you like. Then flip it all over, so you’re looking at the exact bottom of your soon-to-be top.
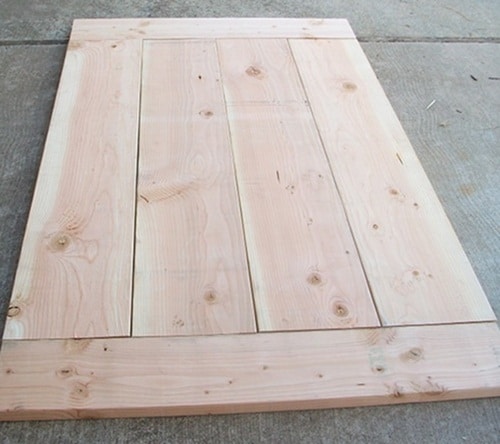
Deciding on the arrangement.
Do this on a FLAT SURFACE–your tabletop will only be as flat as the surface you do this on. Drill your pocket holes and drive the screws in to secure all the pieces together. I recommend clamping it all together while you do this. Repeat the process with the pieces for your leaves.
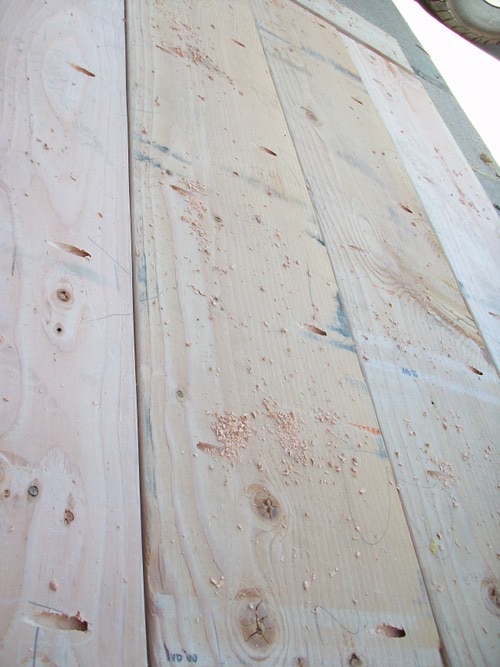
Pocket-holes drilled. Use the 2 ½” pocket-hole screws for every joint.
Guess what? Your top is almost done. You might want to use a belt sander to get rid of any horrible incongruities or lumber print marks. Remember that rough spots, knots, etc. are going to look awesome with some stain–so don’t worry about sanding those out; however, you want the natural curves on the side of your table to extend along the aprons.
Build the Frame
Now let’s focus on the frame. Start by marking the notches for the legs. These should be just a tad bigger than your crossbeams. I put mine 3 ½” above the ground, to match the thickness of the crossbeam.
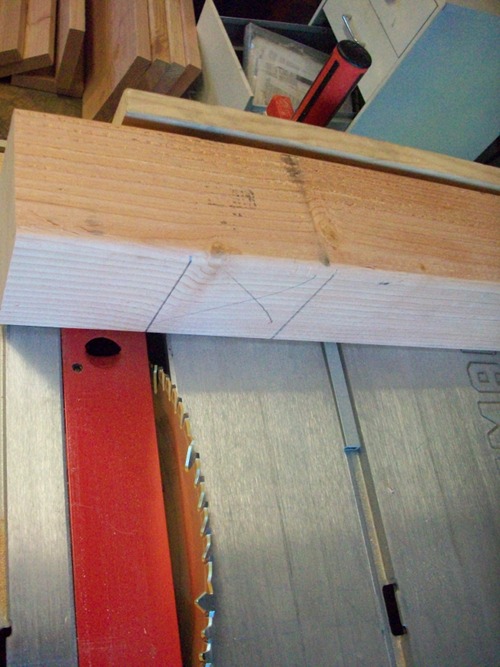
This is just illustrating where you’d mark the wood. You’d rotate it once (“x†facing down) before cutting. Make sure your miter gauge is sturdy enough.
Once you have each piece marked, it’s time to start cutting. Basically what you want to do is raise your table saw’s blade to a little less tall than half the thickness of the leg (about 1 5/8′). This will let the wood over-reach the wood it’s joined to by about ¼” on every side, giving you a nice, rustic look.
Set the rip fence to keep you from going too far up the leg. Cut one slice through at either end of the notch. Then cut out pieces every ¼” or so between those cuts. It’s not as complicated as it sounds–I promise. Look:
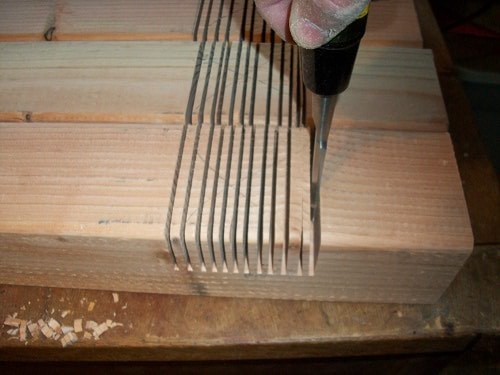
Slices trimmed out with the table saw. From here, you stick the chisel in and pull back. The chips pop right out. It’s a great feeling!
Repeat this on each of your legs and then use your chisel to knock out the slices. You’ll have rough notches at this point. Take each piece back to the saw and run it back and forth and left to right over the running blade (CAREFULLY!) to smooth out the notch.
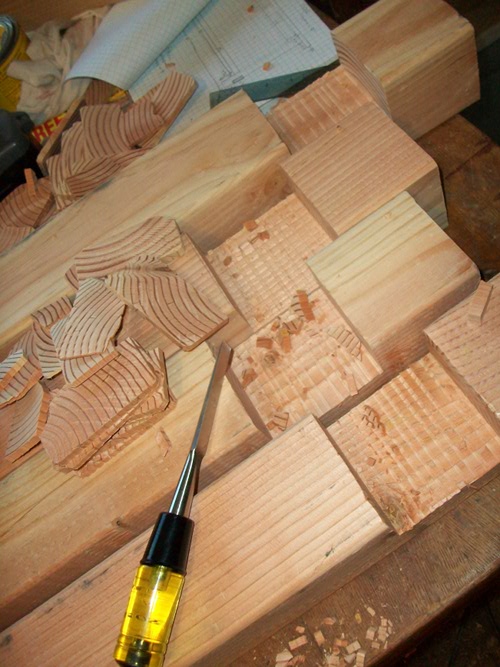
See the roughness in the notches? That’s what you’ll eliminate using the table saw.
Repeat the same process with the crossbeams–notch out the ends and the space for the footrest that goes across the middle.
Test-fit your crossbeams to the legs. Everything look okay? Good.
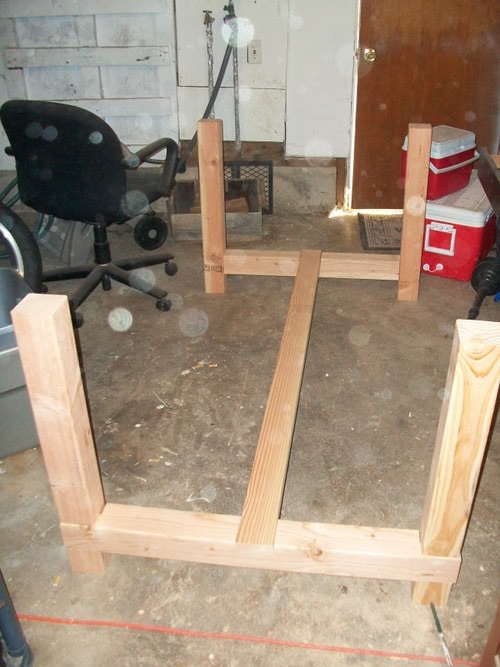
Dry fit test. Nothing is screwed or glued together here–just sitting in their notches.
Now use a 3/8″ drill bit to drill some pilot holes through your crossbeams into the legs.
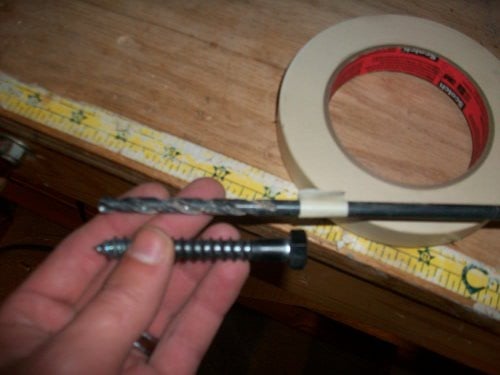
Use a little masking tape to mark the bit so you don’t go too deep!
Once you get all the pilot holes drilled, go ahead and ratchet in your lag screws (be careful if you use a drill to screw these in–they’re STRONG and the drill will try to break your wrist).
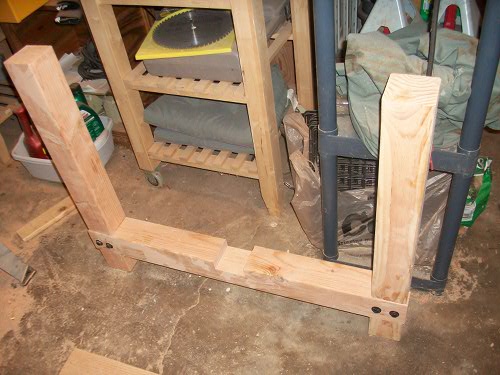
Look at that! You got nice legs!
Now you’re going to sort-of repeat this process to cut some notches in the top rails for your leaves to slide into. Mark the thickness of your 2×2 rails (just a 2×4 cut in half lengthwise) however far in from the edges you want them, and use the same process as before to cut out the notches.
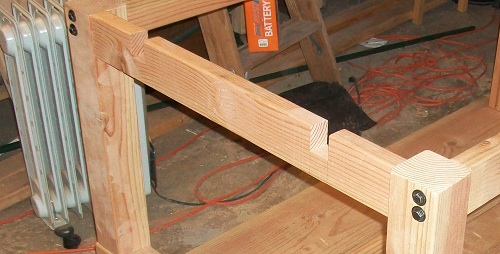
Notches cut in the top end-rails for the leaves to slide into.
Use pocket-hole screws to attach these to your legs. Go ahead and screw on your 2×4 footrest as well.
Now it’s time for one of the trickiest parts–attaching the side rails to the legs. I did this part on top of the tabletop, because it was the flattest surface I could find. We got the rail perfectly straight and I had my wife stand on it to keep it steady as I drilled the pilot hole through the leg and into the rail. Then we screwed in the 6″ lag screws. And I just about broke my arm trying to use a power drill with a socket to do this.
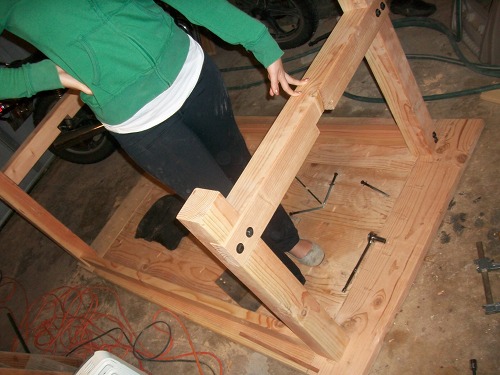
Here you can see my wife’s nice legs, the table’s nice legs, one connected rail (top right) and one yet to be connected (bottom right). The frame is upside down.
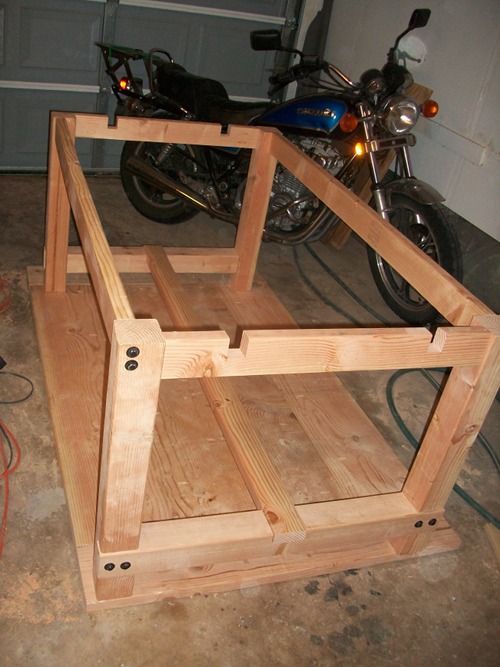
Now the frame is right-side up, sitting on the tabletop.
Now you have a complete top, leaves, and frame. You’re almost there!
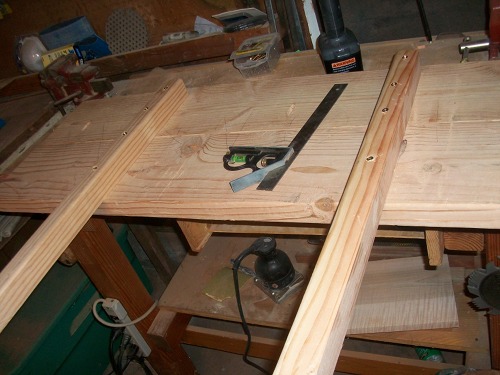
One of the leaves – use a square to make sure they’re straight.
Distress, Stain, and Finish the Table
It’s gotten too tricky lately, so I think it’s time for some catharsis. Let’s beat the crap out of this tabletop. Smack it with chains. Hit it with a pipe wrench. Drop saw blades on it. Burn it with sparklers. Just generally abuse it. Don’t worry–it’ll look great.
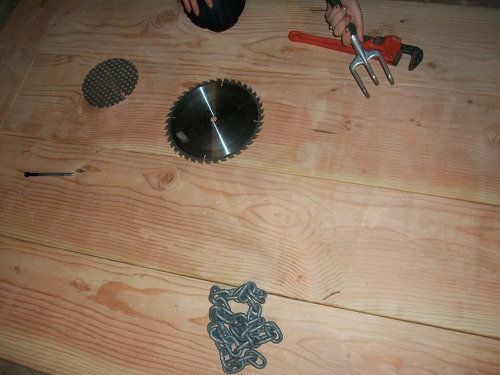
Tools of distress-ion.
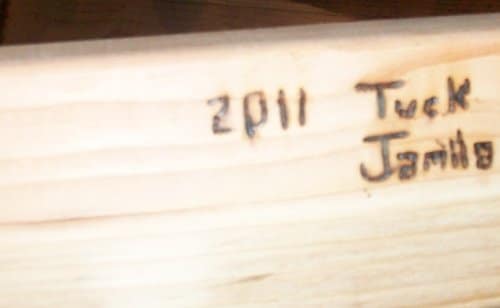
You also need to leave another mark on this–your own signature. We used a soldering iron to do a very amateur and very permanent woodburn with our names and date.
Okay, let’s stain this beast. I should explain that we used Rustoleum’s Dark Walnut Ultimate Wood Stain, but we did it wrong. We failed to mix it well before applying it, resulting in a color we really liked–but not the color this stain is designed to create. When we came back to do a second coat, we stirred it well, resulting in a coat that looked like purple paint. I had to sand it off and start over. So, don’t follow my lead here–follow the can’s directions and TEST before staining all of your new masterpiece!
We did two coats, but that’s optional. What’s not optional is a protective finish. Polyurethane does the trick just fine!
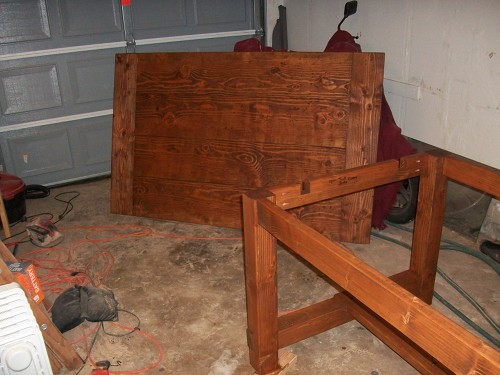
First coat of stain. Don’t judge my garage’s cleanliness.
Your monster of a table is going to be HEAVY, so I strongly recommend moving it to its final destination in two pieces–lay a blanket down in your dining room, put the top on it upside down, then the frame upside down on top of that. Attach a couple 2×4 supports across the frame for good measure, then begin the frustrating process of centering the frame on the top. Once you have the top centered, attach your brackets–I did two on each end and three on each side.
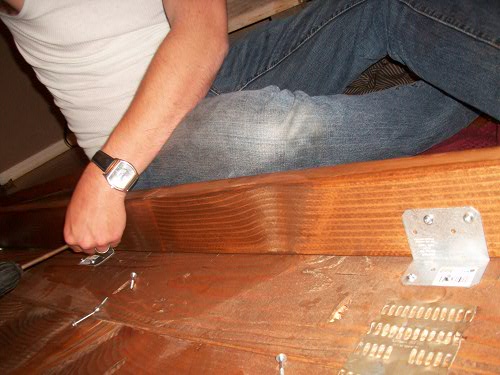
Attaching brackets with 1 ¼” pocket-hole screws.
You got that done? Guess what? You have a brand-new, homemade, beast of a man table. Your only problem is its upside down. Flip that puppy over, find some chairs, let your wife put some girly decorative stuff on it, and get ready to be the next to host Thanksgiving!


