For many societies throughout history, pipe smoking was (and is) a sacred ritual. Men would light their tobacco for various ceremonies including weddings, funerals, and the signing of treaties (hence the term “peace pipe”). It was an important part of their traditions and cultural heritage. In more modern times, gentlemen would smoke a pipe as a way to unwind and relax, or as a refined stimulation to intellectual pursuits like reading and writing. Indeed, while rebellious youth took up cigarette smoking and Vegas gamblers and Hollywood celebs made the cigar their trademark, pipes became the tobacco-delivery method of choice for the gentleman scholar. Still today, when we picture professors in our mind’s eye, we often see them in their elbow-patched tweed jackets, smoking a pipe in their book-lined office.
Many of history’s most famous writers and intellectuals were pipe smoking aficionados, including Sir Arthur Conan Doyle (as well as his fictional creation, Sherlock Holmes), J.R.R. Tolkien, C.S. Lewis (who often smoked with Tolkien as the friends engaged in deep, hours-long conversations), Bertrand Russell, Albert Einstein, General Douglas MacArthur, Papa Hemingway, and many more.
The pipe’s favor with the contemplative set can perhaps be traced to the fact that successful smoking takes a little reflective care, and that a single bowl of aromatic tobacco can last up to a whole meditative hour.
It’s an art that was once common, but now rare. For the modern beginner, therefore, taking up pipe smoking can seem a little intimidating. So below, I walk you through an easy-to-understand guide to everything you need to know when getting started with this ancient practice.
Supplies
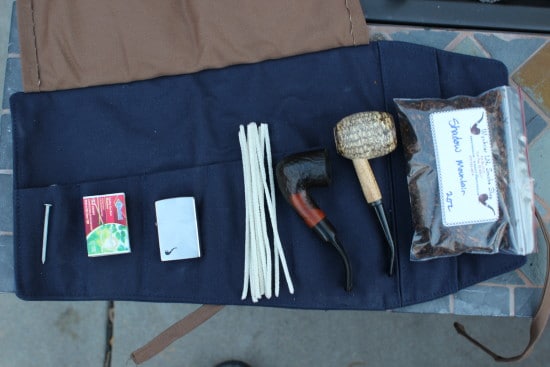
Pipe roll. While certainly not strictly necessary, having a pipe roll, or simply a way to organize your supplies, is very handy. What you see above is simply a waxed canvas utility roll with six or so pockets. Before I got it, my supplies were everywhere, and it was a pain to remember where everything was to wrangle it all up. Plus, it just looks nice. An old cigar box is another good option (but don’t mix your pipe tobacco and cigars — the smells and flavors intermingle, and not in a good way).
Pipe. You can spend anywhere from $5 to $500 on a tobacco pipe. The most common material you’ll find for pipes is briarwood due to its heat resistance, durability, and rugged appearance. There’s also meerschaum, which is a clay-like mineral. Meerschaum pipes often double as incredible works of art due to the material’s softness and carve-ability. Because of its relative rarity, meerschaum pipes are more expensive; they also aren’t quite as hardy as briarwood, so they require a little more care and upkeep. Finally, you have the corn cob variety, which you can even make yourself. They are often your cheapest option, and although they smoke great, you won’t get as many years out of it as a briar or meerschaum pipe. For the first-timer, I’d recommend briarwood or corn cob, due to their affordability. Meerschaum is like the Lincoln of pipes; it’s something to aspire to rather than start with.
The shape of the stem is yet another matter to consider. You’ll find both straight and curved. The argument for straight is that some people prefer its look, and the bowl sits higher, which keeps smoke out of your face a little better. A curved stem, on the other hand, is much easier on the mouth; it’ll just sit there nicely rather than you having to work to keep the pipe situated.
My first pipe was about $35 from a local cigar shop, and did the job just fine. What I use now, and what I recommend to friends who ask, is actually a corn cob pipe with a curved stem from Missouri Meerschaum. I received one as a gift last year, and it’s the only pipe I use now. The price tag is cheap, but the smoking is great.
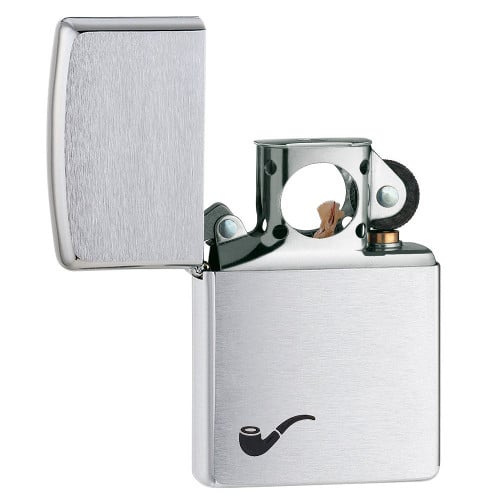
Zippo makes a lighter especially for pipe smoking. Notice the large hole in the chimney.
Lighter. I prefer using a Zippo for all my tobacco needs, even though experts will say it’s not necessarily the optimal flame. The company actually makes a special lighter just for pipe smoking, which comes with a hole in the chimney, allowing you to hold it sideways and suck the flame through. It’s incredibly useful; otherwise you’re holding a lighter or match nearly upside down, and are liable to burn yourself.
Long wooden matches do also get the job done, and many smokers swear by them. Because of a lighter’s high temperature, you risk scorching the tobacco; this is not a risk that comes with matches. They’re also cheaper; Zippos and their fluid (they do need seemingly constant refilling) are more expensive.
Pipe cleaners. Who knew that these bendy doodads actually serve a greater purpose beyond just crafting material? Pipe aficionados, that’s who. They are called pipe cleaners for a reason. Buy some; they are super cheap, and keep your pipe clean between smokes.
Tamper/nail. Many pipe kits will come with a special tamping tool. It looks much like a nail, so I just use a nail with a big ole head; a framing nail does the trick really well. You need this to tamp down the tobacco into the pipe bowl. I also keep a small, thin nail on hand for reasons I’ll explain later.
Tobacco. Pipe tobacco is not as easily had as cigars are, which you can often even get in grocery and liquor stores. You’ll likely need to find a dedicated cigar/tobacco shop. This is often a fun endeavor, though, and you get the chance to sniff test a variety of tobaccos. There are no secrets here, you simply go with one that smells good to you. There are fruitier varieties, darker and lighter, more classic tobacco-y, etc. A couple ounces should last you a while if you’re just an occasional smoker.
Packing the Pipe
This is undoubtedly the hardest part for newbie pipe smokers (and even some not-so-beginners). The good news is that once you get it down, it’s a breeze. I struggled for a quite a while myself, but after practicing a bunch, I really got the hang of it. There are a couple methods that you’ll find most smokers using, and I’ve had success with both, so what follows are instructions for each.
The Three-Layer Method
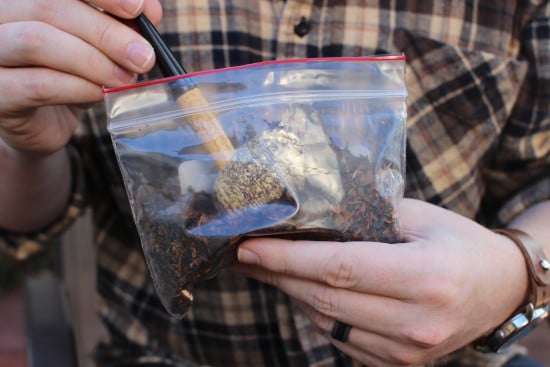
The first step is to do a “gravity fill”; this is where you grab a pinch of tobacco and simply drop it into the bowl of the pipe with no tamping or pushing down. Another way to do this is to scoop right from the bag or jar of tobacco with the pipe itself.
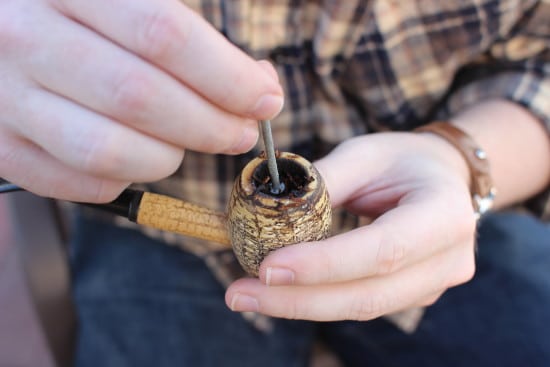
Fill it this way to the top, and then tamp it so that the bowl is about halfway full. This is the first layer. You’ll do the same thing again, filling it loosely to the top, then tamping it down, this time to 2/3 or 3/4 full. This is the second layer. Finally, you’ll do it once more. Put some more tobacco loosely on top, and tamp it down to just below the rim of the bowl. With each layer it should feel like the pressure increases with the tamping; the first layer won’t need much pressure at all, and by the third you’ll really be pushing on the tobacco.
Test the draw on the pipe at this point; it should be reminiscent of sucking soda through a straw. If it’s like an empty straw, it’s packed too loose (tamp it, and add more tobacco); if it’s like sucking a milkshake through a straw, it’s packed too dense (use a thin nail to poke a hole down the middle of the tobacco; I usually do this anyway, even if it’s packed correctly, just to have better airflow). This is the method that I prefer, and have had the most success with.
The Pinch or “Frank” Method
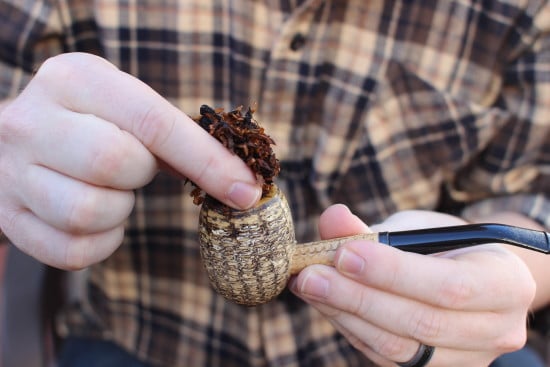
Grab a large pinch of tobacco — enough that it actually looks like it may not fit.
With this method, you’ll start the same by gravity filling the bowl with tobacco. No pressing or tamping, though. Next, grab a large pinch of tobacco; in fact, you want more than what it seems like will fit into the pipe. Place the large pinch on the bowl, using your thumb on the opposite hand to hold it in place.
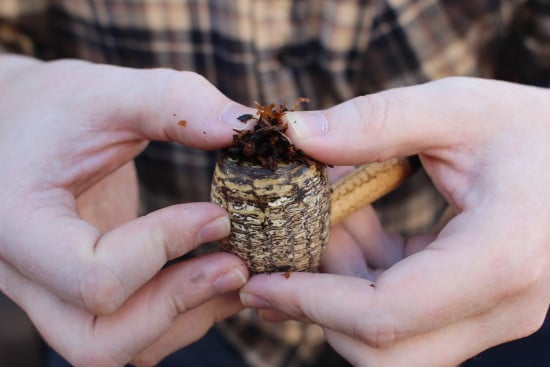
Now, using both your thumbs, gently press the tobacco into the bowl. Do this until all the tobacco is in the pipe, tight enough so that when you tip it upside down, no tobacco falls out. As with the three-layer method, test the draw. It’s likely you’ll need to use the small nail to poke a hole down the center to let some air in.
Lighting the Pipe
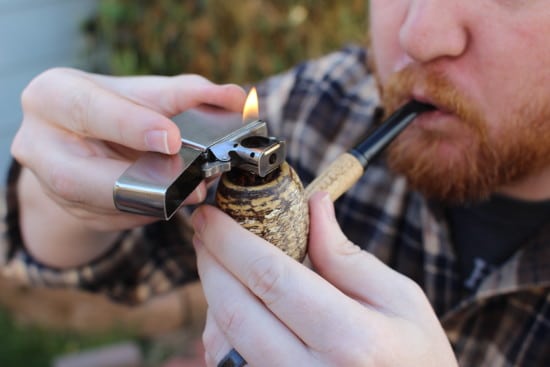
The first step in getting a pipe lit is the charring light. Holding the flame above the bowl, take about half a dozen shorter puffs, while moving the lighter in a circle around the bowl, in order to char the top of the tobacco. After this, tamp it down once more to create a nice caking on the top.
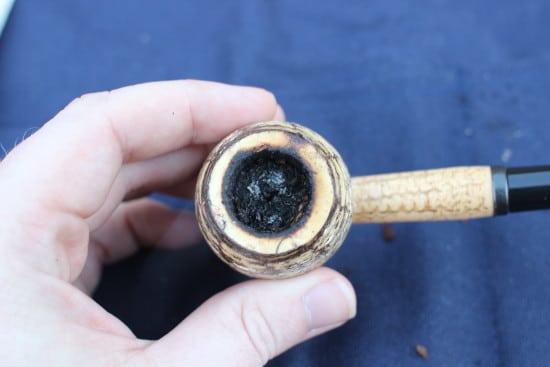
After the charring light.
After this charring light, once again hold the flame above the bowl, and this time take a half dozen deep draws to really get the flame down into the tobacco. Once lit, continue to take some deeper puffs to make sure you get a nice ember that will last a long time.
Especially for the beginner, you’ll probably have to re-light your pipe multiple times to get through the bowl of tobacco. As you get better at packing, and lighting, you won’t have to do this. It just takes practice; I can get a bowl to last about 45 minutes, with only having to re-light once.
Cleaning the Pipe
Your pipe should ideally be cleaned after each smoke. After letting it cool for an hour or so, remove the stem, and run a pipe cleaner through it a few times. It should be noted that you don’t ever want to remove the stem from a hot pipe, as it can easily warp over time. Most pipe smokers, myself included, opt to not clean the bowl at all, besides getting any ash or unsmoked tobacco out. Not cleaning the bowl allows a nice cake to build up, which imparts even more flavor (similar to a cast-iron skillet).
Troubleshooting the Pipe
If the pipe ever gets too hot to hold, you’re smoking it too hot. Let it die out, try re-lighting, and take fewer puffs next time. Most smokers puff every 10-30 seconds or so; it’s not constant. The same is true if you ever feel burning in your mouth, called “tongue bite.” Trust me, you’ll know it if/when it happens; let it die out, and re-light the pipe. If it just dies while you’re trying to smoke it, you didn’t get it lit well enough in the first place, or it’s not optimally packed. You’ll learn which it is as you go along; again, it just takes practice.
Pipe smoking is quite an enjoyable hobby once you get the basics down. Join the likes of some of the most brilliant gentleman scholars of the last couple centuries, and enjoy a few puffs from time to time while sitting in your man chair reading your favorite book!
Tags: Vices


