Editor’s Note: This is a guest post from Stacy Harris.
With deer hunting season drawing to a close this month, you’ve likely been packing up cuts of the bounteous game you’ve bagged and putting them in the freezer…placing them right on top of the venison from last year you socked away and still haven’t eaten.
Maybe you love to hunt and love the idea of eating what you kill, but you just can’t get motivated to chow down on some deer meat. Or maybe you yourself would love to whip up a venison stew, but it’s your family that starts making gagging noises whenever you broach the idea.
I understand. I’ve met plenty of people who, whenever you mention venison, say something to the effect of, “Hmmm, every time I’ve cooked or tasted deer meat it has been tough and gamey.” Or maybe they haven’t even tasted it, but they’ve always heard it was tough and gamey and so haven’t wanted to. And honestly, they’re right…if the venison is not prepared correctly.
But I would really encourage you to give venison another (or a first!) chance. If deer meat is processed, aged, and prepared correctly, it’s so good that you may want to quit your job and live off the land (okay, maybe not that good, but close). Truly, venison will become your ultimate victual overall protein staples in your kitchen.
Aside from the incredible earthy flavors venison offers, the meat is incredibly healthy. It is a great source of B vitamins, zinc, niacin, and phosphorus, and additionally, it contains higher omega-3 fatty acids and lower fat than corn-fed beef. If you harvest your own venison, you can rest assured that you are getting fresh meat that includes no added hormones, antibiotics, nor genetically modified organisms. What could be better?
Obviously, venison is a staple in my home, and once you get a few tips and recipes up your sleeve, I’m confident it will become a mainstay in yours as well.
Aging the Meat
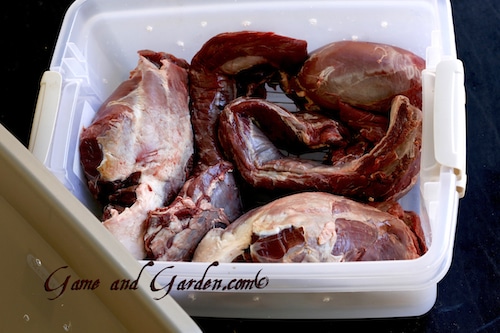
If you are harvesting your own deer, getting it to the processors or getting it dressed as quickly as possible is the first step to creating excellent meat. If using a processor, they will probably age the meat for you in a walk-in cooler at a consistent temperature between 34 and 37 degrees Fahrenheit. Our family usually harvests between 10 to 15 deer a year, and we process and dry age our deer at home. It is really not that difficult and saves quite a bit of money, which is never a bad thing.
To make your own aging apparatus, purchase a plastic bin, and poke holes in the sides and top of the bin. Once you have done this, place butchered venison on a cooling rack inside the bin. Leave the meat in the apparatus in the refrigerator to age at a steady temperature of 37-40 degrees Fahrenheit. Every few days, empty the blood from the bin and continue aging the meat for seven to ten days. Many people allow the meat to age for up to fourteen days, but seven to ten is sufficient to break down the connective tissue and muscle fiber for tasty meals.
Now that you have processed and aged the meat properly before freezing it, the sky is the limit as far as the succulent recipes that you can prepare. The most effective and reliable way to create succulent meat is to match the cuts of meat to the cooking method, just as with beef and pork.
Cooking with Venison – By Cut and Method
One huge mistake that people make when preparing venison is that they cook it just as if it were beef. Venison is very different than beef (though not so much different than pasture-raised beef) in that it has no marbling and contains very little fat. To get the most out of your deer meat, you need to pick the right cuts for the right recipes and cook them in a way that best brings out their flavor.
Loins (Backstraps) and Tenderloins
Just as in beef, the loin (sometimes called the backstrap), and the tenderloin are the most tender cut of meat. I always serve this cut rare or medium-rare. Cooking it beyond the medium-rare stage will result in tough meat…especially with venison!
Sometimes I will create a dry rub for the loin (keep reading for a dry rub recipe), but often I just season with olive oil, salt, and pepper and place in a super hot cast iron skillet to brown on all sides for a few minutes. Depending on the size of the loin, you may need to place the browned venison in an oven at 350 degrees for 5 minutes.
Note: Always let your meat rest for about 10 minutes before cutting for best results.
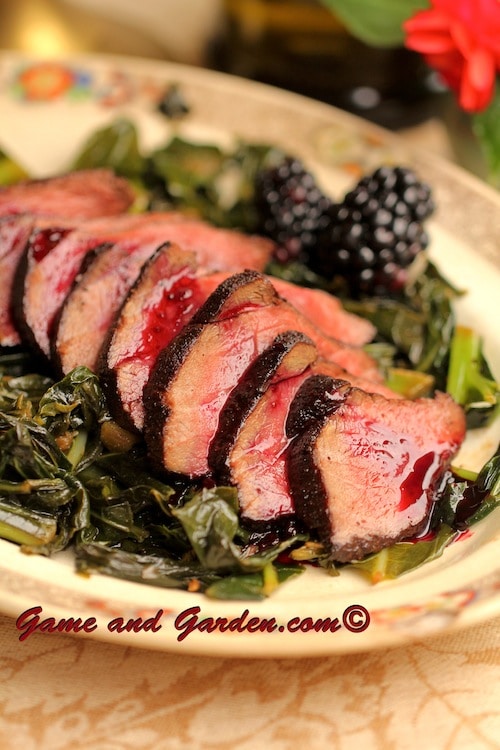
Chili Cocoa Crusted Venison with Berry Reduction
Ingredients
- 1/3 cup coffee grounds
- ¼ cup cocoa
- 2½ tablespoon salt
- 1 tablespoon brown sugar
- 1 teaspoon cinnamon
- ½ teaspoon cayenne pepper
- ½ venison loin
- Olive oil for browning
Directions
- Preheat oven to 350 degrees.
- In a medium bowl, mix coffee grounds, cocoa, salt, brown sugar, cinnamon, and cayenne pepper. Rub the mixture into the loin.
- Heat cast-iron skillet to almost smoking. Place loin into skillet and brown on all sides.
- Place loin in a 350-degree oven 4 to 5 minutes, depending on the size of the loin. Remove to a cutting board. Let rest for at least 5 to 10 minutes.
- Slice into 1-inch pieces on a platter and spoon berry reduction (see below) on top of venison. Serve with collard greens.
Berry Reduction
Ingredients
- 1½ cups blackberries
- ½ cup blueberries
- ½ cup red wine (cabernet sauvignon)
- ¼ cup of sugar
- 1 lemon, juiced
- Kosher salt, to taste
Directions
1. Place blackberries, blueberries, red wine, sugar, and lemon juice in a small saucepan and bring to a boil. Reduce the heat to simmer and reduce by half. Season with salt to taste.
Shoulder, Shanks, and Neck
The shoulder, shanks, and neck of a deer are notoriously tough and stringy. The great thing about this cut is that when braised, the mass amounts of connective tissue and muscle fiber melts into collagen that thickens into a luscious silky gravy and creates tender flavorful meat. You can braise the hindquarter (sometimes called the roast) of the venison and get superior results as well.
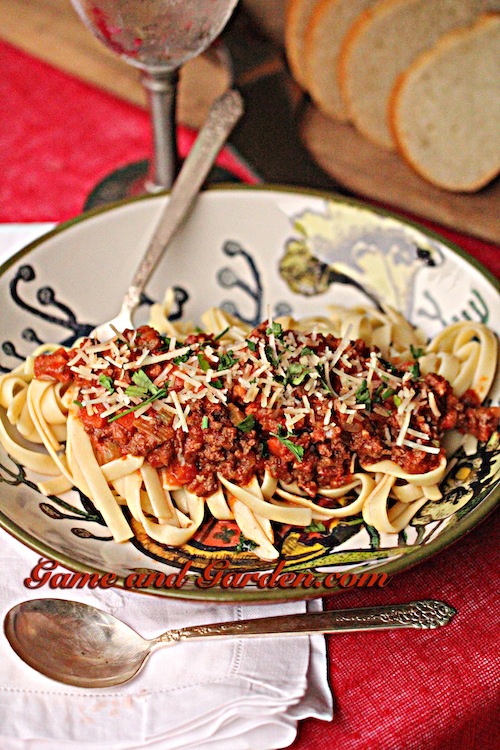
Most often, though, people choose to grind the shoulder, shanks, and neck into ground venison meat. I enjoy creating sausage, meatloaf, and Bolognese with this cut. Adding equal parts beef or pork to the ground meat will give you just the right amount of added fat to create flavorful fare.
Ragu Bolognese

Ingredients
- ¼ cup extra virgin olive oil
- 2 medium onions, finely chopped
- 4 ribs celery, finely chopped
- 2 carrots, finely chopped
- 4 cloves garlic, sliced
- 1 pound ground venison
- 1 pound ground beef
- 4 ounces slab bacon, finely chopped
- 2 16-ounce cans of tomatoes, crushed
- 2 tablespoons tomato paste
- 1 teaspoon fresh thyme leaves
- 1 cup dry red wine
- ½ cup heavy cream
- ¼ teaspoon nutmeg
- Kosher salt and freshly ground pepper
- 1 box Fettuccine noodles
- ½ cup Parmesan cheese, plus extra for serving
Directions
- Heat olive oil in a heavy-bottomed pot over medium heat until hot. Add the onions, celery, carrots, and garlic and cook for 5 minutes or until vegetables are translucent.
- Increase the heat and add venison, beef, and bacon, stirring often.
- Add tomatoes, tomato paste, wine, and thyme. Bring to a boil, then lower to a simmer for 1 hour.
- Meanwhile, bring a large pot of water to a boil. Add 1 tablespoon of oil and 1 tablespoon of salt to the water. Add Fettuccine to the water for about 12 minutes or until al dente.
- Add heavy cream and nutmeg to the sauce. Simmer about 8 to 10 minutes. Season with salt and pepper to taste. Remove from heat, and let cool.
- When the pasta is cooked, drain and place the noodles on 4 to 5 plates. Top the pasta with the sauce. Divide the Parmesan cheese among the plates and serve.
Hindquarter or Hindquarter Roast
The hindquarter or hindquarter roast is an extremely versatile cut of meat. I use this most often for the fact that it is the largest piece of meat on the deer. There are many tendons and quite a bit of silverskin throughout this cut of meat, but if care is taken to remove them, the quality of your meat will drastically improve.
Although the meat of the hindquarter will be tougher than the loins, if prepared correctly, it will give you delectably tender meat. I use a variety of methods to extract flavor and tenderness from this cut.
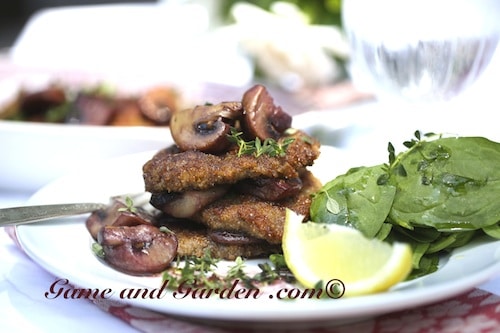
Cutting the hindquarter into steaks and pounding each steak to about 1/4-inch thick will always give you fork-tender meat. As you pound the meat, the connective tissue, and muscle fiber tear, creating a “melt in your mouth” piece of protein. I use this technique when making Parmesan Venison, Venison Marsala, Chicken Fried Steak and Gravy, Wiener Schnitzel, and Venison Scaloppine. These are all winners in my home!
Venison Scaloppine
Ingredients
- 1½ pounds venison
- 2 cups all-purpose flour
- 2 teaspoons kosher salt
- 1 teaspoon freshly ground black pepper
- 3 extra-large eggs
- 2 cups breadcrumbs, dried and seasoned
- 1 pound large button mushrooms, quartered
- 1½ cups sherry or marsala wine
- Olive oil, for sauteing
- 4 tablespoons cold unsalted butter
- 3 tablespoons fresh thyme leaves
Directions
- Slice venison into 1-inch pieces. Pound to ¼-inch thick.
- On a plate, mix together flour, salt, and pepper. On a second plate, beat the eggs with 1 tablespoon of water. On a third plate, add the breadcrumbs.
- Lightly dredge venison in the flour mixture, then the eggs, and lastly the breadcrumbs.
- Heat oil and half the butter in a large cast-iron skillet or sauté pan. Cook venison about 2 minutes over medium heat on each side or until brown. Transfer pieces of venison to a cooling rack.
- Add a little more olive oil and the mushrooms to the pan until juices have been absorbed. Add sherry to mushrooms and reduce them by half. Add remaining butter to the pan and bring just to a boil. Lower the heat to medium and cook for about 5 more minutes.
- Stir in the thyme leaves. Pour mushrooms and sauce over the venison and serve.
Braising
Braising is a perfect option for any cut of meat that is tough, such as the neck, shoulder, and hindquarter. Braising is a cooking technique in which the main ingredient (venison) is seared and then simmered in a pot over low heat. Your best option is to cook in a Dutch oven on top of the stove on a very low simmer. The optimal simmering temperature is between 131 and 149 degrees Fahrenheit. If the temperature rises to more than 149 degrees, it will begin to toughen instead of relaxing. You can also place your Dutch oven inside the stove at the lowest possible temperature.
I like to allow the meat to cool, then place it in the refrigerator overnight so that the meat continues to relax. If you don’t have time for that, just turn the heat off and let the meat rest 30 minutes to 1 hour, rewarm on a very low simmer, and you will have a fantastic meal.
Venison Bourguignon
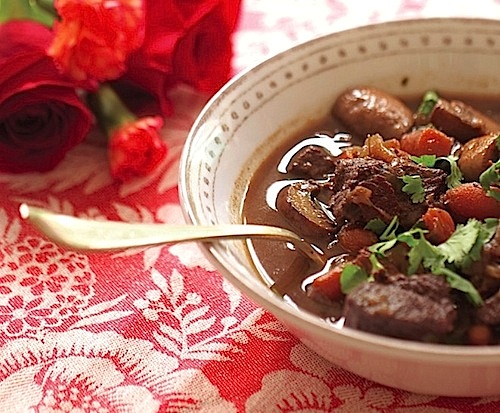
Ingredients
- 3 lbs. braised venison hindquarter, cut into 1-inch pieces
- 2 tablespoons olive oil
- 8 oz. bacon, diced
- Kosher salt
- Freshly ground black pepper
- 4 large Vidalia onions
- 4 carrots, sliced diagonally into 1-inch chunks
- 2 teaspoons chopped garlic (about 2 cloves)
- 2 1/2 cups canned beef broth
- 2 cups good red wine
- 1 tablespoon tomato paste
- 2 teaspoons fresh thyme leaves
- 2 tablespoons all-purpose flour
- 4 tablespoons (1/2 stick) unsalted butter at room temperature, divided
- 1 lb. mushrooms, thickly sliced
- Parsley (for garnish)
Directions
- Heat the olive oil in a large Dutch oven or stockpot over medium heat. Add the bacon and cook for 8 to 10 minutes, or until the bacon is lightly browned. Remove the bacon with a slotted spoon or tongs.
- Salt and pepper venison. In a very hot skillet add a single layer of venison, brown it on all sides, working in batches. Do not crowd the pan or the meat will steam instead of brown. Set aside.
- Place onions, and carrots into the Dutch oven or stockpot. Cook over medium heat for approximately 10 minutes, or until the onions are lightly browned. Add garlic and cook for one minute longer. Add the wine and broth into the pot. Add the venison, bacon, tomato paste, and thyme. Bring to a boil. When it reaches a boil turn it to low and simmer for about 2 hours.
- Sauté mushrooms in 2 tablespoons of butter until lightly browned. Add to stew.
- Thicken the stew by mixing 1/4 cup of water, 2 tablespoons of flour, and 2 tablespoons of butter in a bowl. Pour mixture into the pot. Simmer for about 5 minutes.
- Garnish with parsley and serve with crusty bread and butter.
Dry Rubs and Marinades
Dry rubs and marinades are another perfect solutions for infusing flavor and tenderness to venison. There are endless combinations of herbs and spices that can be used. To use this method, combine spices and rub vigorously into the meat, cover, and refrigerate overnight to allow the spices to permeate flavor into the meat and to tenderize.
There are enzymatic tenderizers, which use papaya, figs, or pineapple that break down the amino acids in the meat, but I prefer to make my own. Sometimes the supermarket enzymatic tenderizers can make your meat mushy. I will often use coffee or ginger in my dry rubs because they are acidic and will break down the enzymes in the meat just as a marinade would do, producing tender, but not mushy meat.
Stacy’s Dry Rub (for 3 pounds of meat)
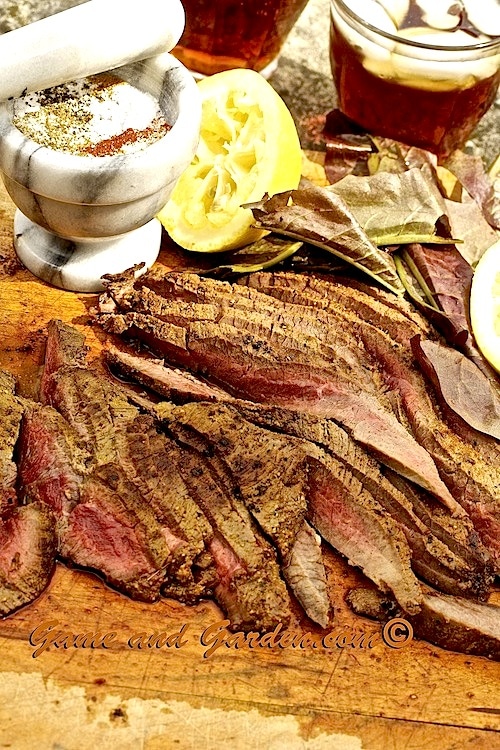
Ingredients
- 2 tablespoons Kosher salt
- 1 tablespoon ground smoked cumin
- 1 tablespoon freshly ground pepper
- 1 tablespoon ground coriander
- 1 1/2 teaspoon garlic powder
- 1 1/2 teaspoon cayenne pepper
Directions
- Mix all ingredients and rub thoroughly into the meat. Cover the meat and refrigerate at least 3 hours. I like to leave it in the refrigerator for 24 hours or overnight.
Marinades
Marinades are an easy, quick way to tenderize venison and permeate flavor into the meat. Marinades rely on an acid such as wine, vinegar, lemon juice, or lime, and oil, herbs, and spices of your choice. The acid denatures the meat, which always results in tender venison, and the herbs and spices add a variety of tastes as you interchange them with each new marinade. To use this method, combine ingredients in a non-reactive bowl, cover, and refrigerate for up to 24 hours. You could also put the ingredients in a zip-top bag and refrigerate for easier cleanup.
If I don’t have time to tenderize my meat using the above-mentioned methods, I like to cut the hindquarter horizontally, liberally season the meat, then brown the meat in a super hot skillet for about 3 to 4 minutes on each side and let it rest for ten minutes on a cutting board. Simple as that! I then will slice it very thinly across the grain and serve it on sandwiches, over pasta, or in burritos and enchiladas.
By slicing the meat horizontally, you are cutting through tough muscle fiber and have more surface area for adding flavor. Furthermore, by slicing the meat as thinly as possible across the grain of the meat, you are again cutting through the fibers, creating a tender piece of meat from an ordinarily tough cut.
Just knowing a few of these easy tips and recipes, you have in your arsenal every weapon needed to create excellent fare using venison! Feed your craving and keep venison stored in your freezer for healthy, succulent, and satisfying meals for every day.
What are your techniques and recipes for making great-tasting venison? Share your tips with us in the comments!
________________________________
Stacy Harris is pioneering the farm-to-fork eating movement that includes harvesting wild animals in addition to domesticated animals and homegrown fruits and vegetables. She’s the author of several books and a DVD about sustainable living for healthy families, including Happy Healthy Family Tracking the Outdoors In, Wild Game: Food for your Family, Recipes and Tips for Sustainable Living, and Gourmet Venison DVD. For more recipes like this check out her website at GameandGarden.com
Tags: Recipes

