
While the baking of bread seems like an interesting and tasty hobby to lots of folks, they often don’t get around to dabbling in it because of constraints on their time. If you’re in and out of the house a lot, it can seem hard to fit phases of dough making, rising, and baking into the schedule.
With most everyone decidedly in the house these days, the landscape looks quite different, and if my Instagram feed is any indication, lots of people are suddenly using the extra time they find themselves with to finally try their hand at being a baker. It’s not only an activity with which to stay busy, but a comforting one to boot; few foods are as soothing to the soul as oven-fresh carbs.
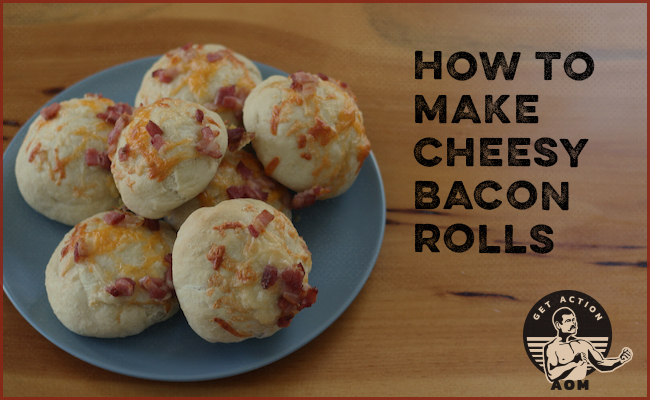
If you’re looking for a recipe that’ll both increase your competence in the kitchen, and yield a foodstuff that’s heavy on the comfort factor, look no further than these soft, savory filled rolls. They not only feature bacon and cheese inside the roll, but atop it as well. It doesn’t get much better. While it’s not necessarily a recipe for a total beginner, it doesn’t take expert-level skill either.
How to Make Cheesy Bacon Rolls
Ingredients
Rolls
- 2 tsp instant yeast
- 360 grams bread or all-purpose flour (3 cups)
- 1 tsp salt
- 1 1/4 cup warm water
- 1 tbsp olive oil
Filling/Topping
- 6 slices bacon, separated and cut into small bits (4 slices for filling, 2 for topping)
- 8 thick squares of cheese, 1 1/2†square (this is for the filling, so use any melty cheese you prefer)
- 1/2 cup grated cheddar cheese, for the topping
1. Whisk Dry Ingredients Together
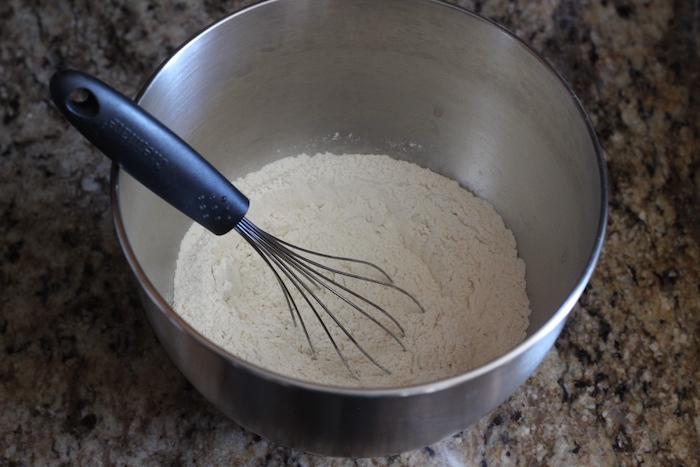
In the bowl of your stand mixer (or any large mixing bowl), whisk together the yeast, flour, and salt.
2. Add Wet Ingredients
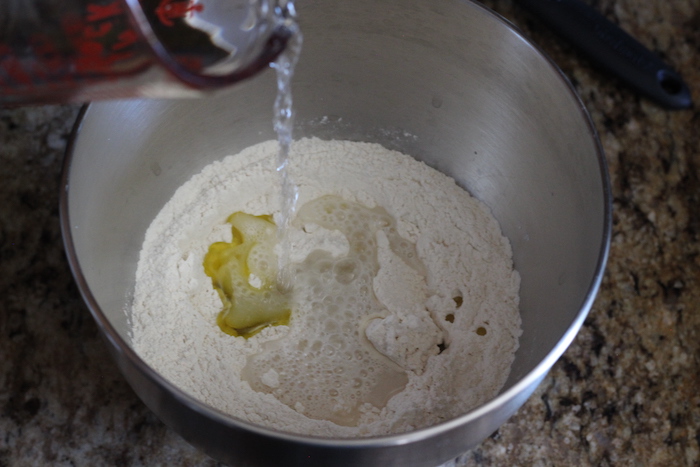
Add the water and oil. Attach the bowl to the mixer and start the dough hook on low speed. Mix for a few minutes, until the dough clears the sides of the bowl and is nice and smooth. If it’s really sticky, add a tablespoon of flour. If the dough isn’t fully coming together, add a tablespoon of water. You can also do this by hand with just a spatula — mix and knead well until the dough is smooth.
3. Let Rise Until Doubled
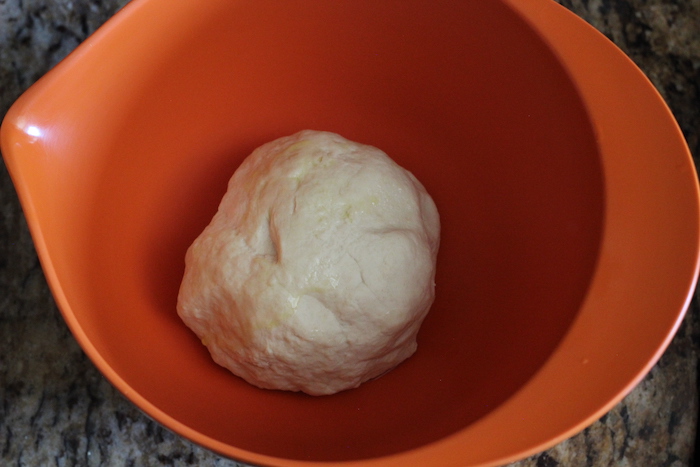
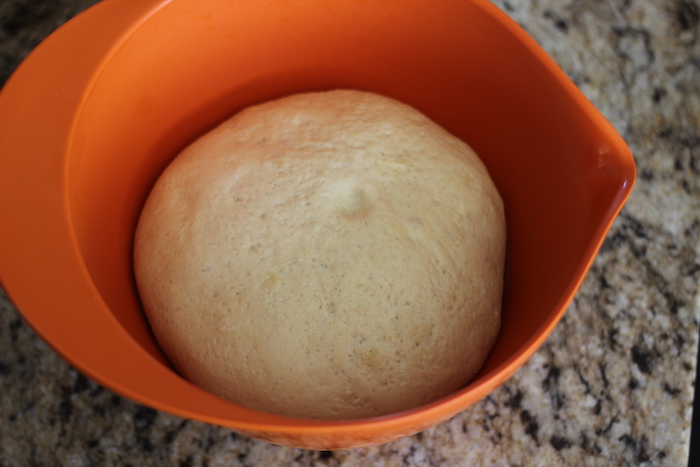
Cover the dough (using plastic wrap or a dish towel) and let rise until doubled, 1-1.5 hours.
4. Cook Bacon for Filling
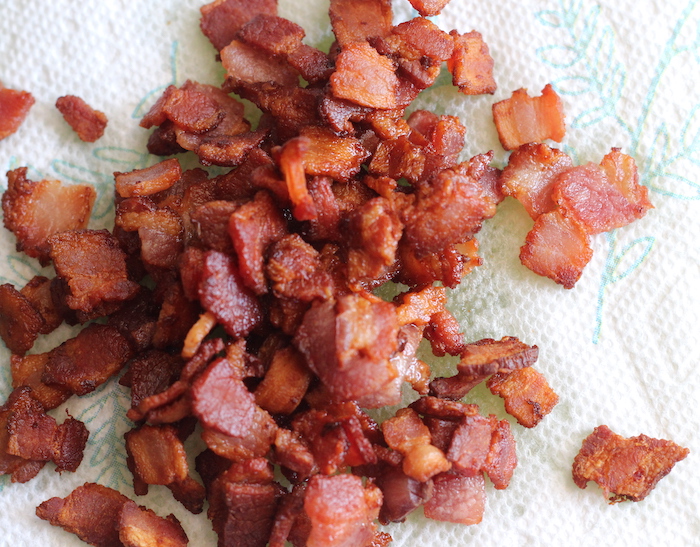
While the dough is rising, cook the pieces you cut up from 4 slices of bacon; you’ll use this cooked bacon for the filling. (Reserve the raw pieces from the other two slices you cut up for the topping.) Cook the bits until they’re dark and crispy. That’s how I prefer it at least. Once cooked, set aside on a paper towel.
5. Prepare Cheese
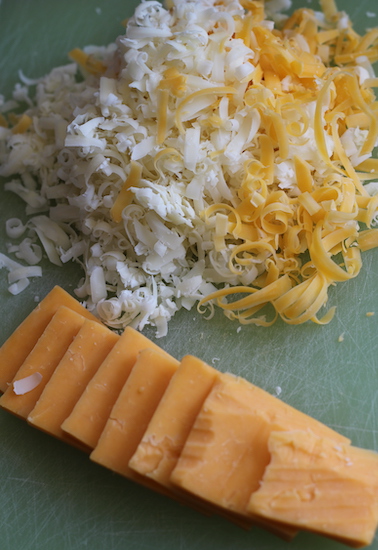
After your bacon is cooked up you can prepare the cheese that you’ll use for both the filling and the topping. For inside the rolls, you’ll want 8 squares of a melty cheese. I used a mild cheddar and made them about 1 1/2†square and perhaps 1/4†thick. Once you’ve sliced the filling cheese, grate 1/2 cup sharp cheddar for topping the rolls (or measure out some pre-shredded cheese).
6. Portion Out the Rolls
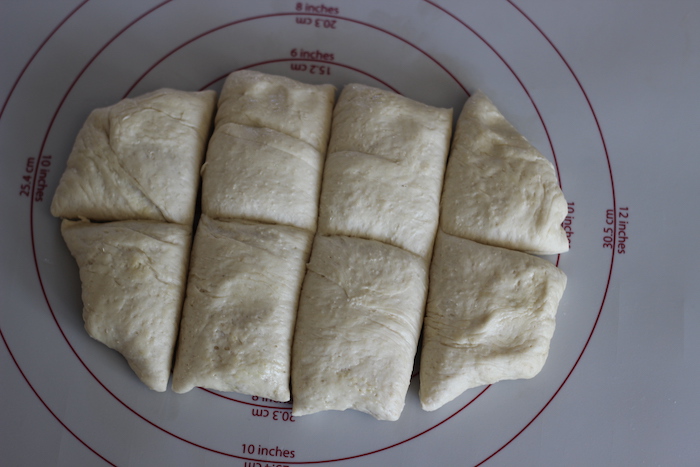
Once the dough has doubled, turn it out onto a floured counter (or baking mat; my trusty baking mat gets a ton of use). It’s not terribly sticky, so you won’t need a ton of flour. Flatten it and make a rectangle that’s roughly 6†x 9â€. Using a bench scraper or pizza cutter, divide the dough into 8 chunks.
7. Fill and Shape Rolls
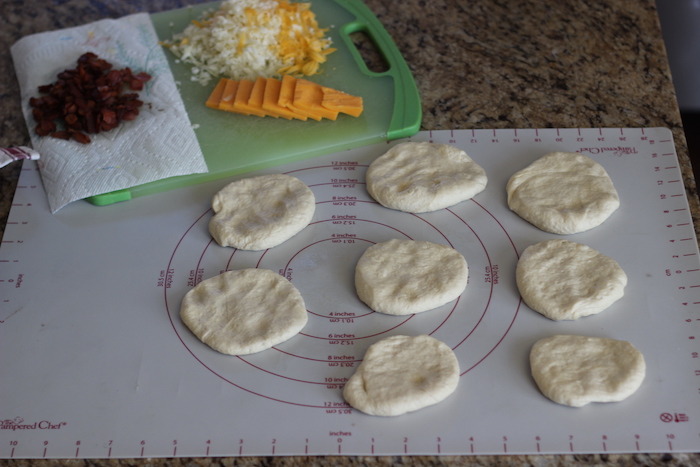
Take each piece of dough and flatten into a circle roughly 3-4†in diameter.
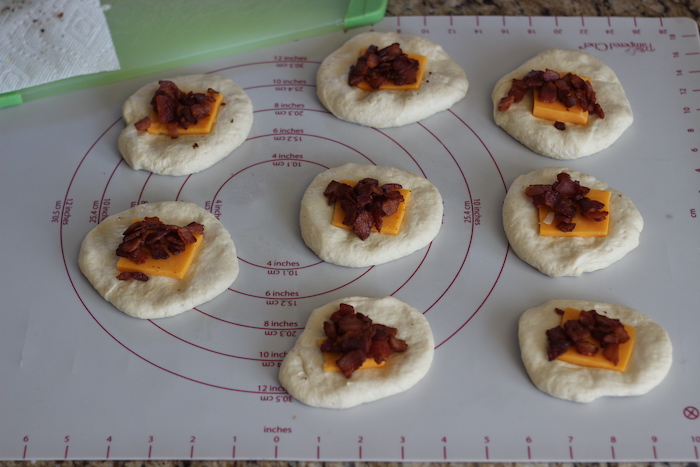
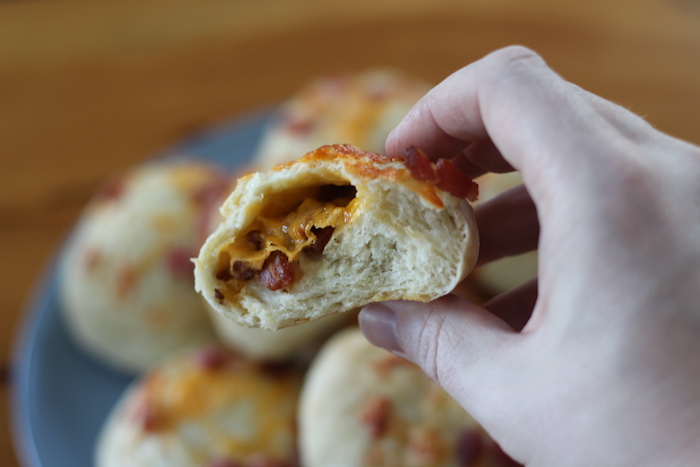
Place a slice of cheese in the middle as well as about 1 tbsp of the cooked bacon.
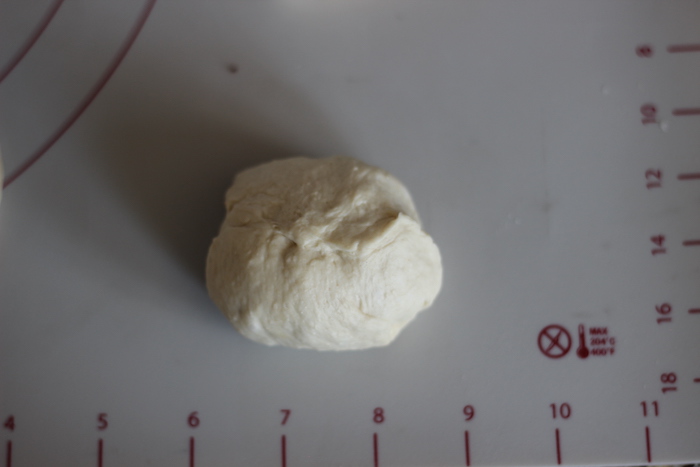
Once all the fillings are added, shape the rolls by stretching and pulling the sides up and over the filling, and crimping the seam to make a tight seal. You don’t want any melty cheese escaping. Place seam-side down on a greased baking sheet and flatten them some so that they resemble a hockey puck more than a perfectly spherical ball.
8. Add Topping
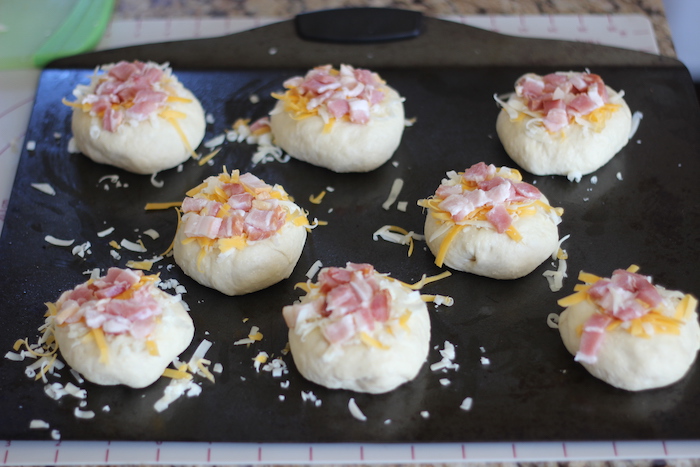
Once you’ve done that, you can add the bacon and cheese topping. Give each roll some raw bacon chunks (just portion it out evenly amongst the 8 rolls) and roughly 1 tablespoon of cheese.
9. Preheat Oven + Let Rolls Rise
Preheat the oven to 350 F. Let the rolls rise while the oven is warming up, plus another 5 minutes or so. You want them to look puffed up a little bit.
10. Bake

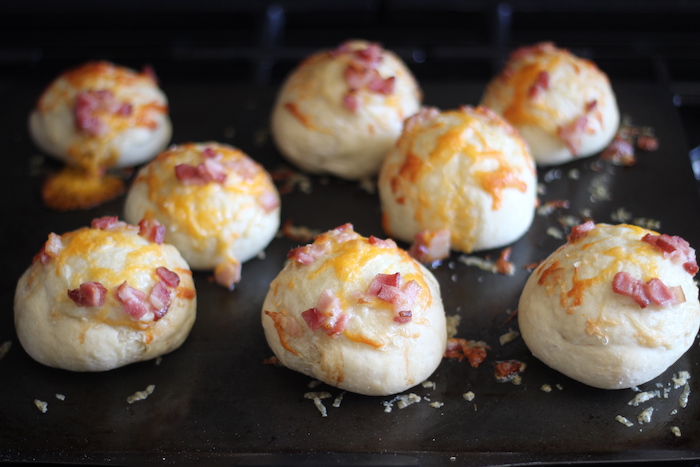
Bake for 25 minutes, until the bacon on top looks cooked and the cheese is a melty golden brown.
11. Serve warm and enjoy!

Let cool at least 10 minutes and dig in as soon as you can handle ‘em. Best enjoyed while the cheese is gooey, of course!
To re-heat, warm up in tin foil in the oven (350 F) for about 20 minutes — I just throw ‘em in right when I turn the oven on rather than waiting for it to pre-heat.
Tags: Recipes