
Editor’s note: This is a guest article from TJ Cosgrove.
You’ve likely never given much thought to pencils (though you really should!). Likewise, you’ve probably never lent much thought to how to sharpen your pencils, defaulting to whatever was on hand.
But much like pencils themselves, pencil sharpeners are a rich and detailed rabbit hole into which you can easily fall, should you find yourself drawn to minutia and the perfection of craft.
There are many different ways to sharpen a pencil, and everyone is convinced that theirs is the best. Here I will discuss some of the more popular methods of wood shaping and graphite forming, including when, where, and why you might choose one over the other, how each is done, and a specific suggestion for the sharpener to use with each respective approach.
The Knife
- Required elements: A sharp and capable blade + a steady hand
- Time required: 3-5 minutes
- Complexity: 3/5
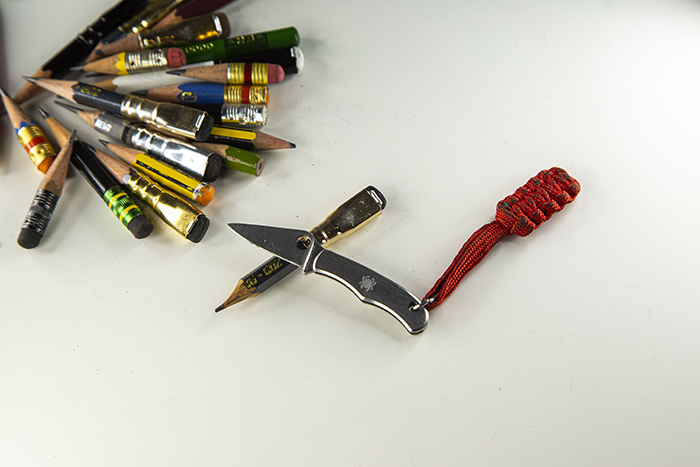
- Recommended tool: Spyderco Bug (~$15)
Ever since man discovered knife, man has used knife to make blunt things pointier. Pencils are no exception.
Who Uses It?
For the artist, the blade represents a way to hone and craft a perfect point, from long and tapered to dull and wide.
For the tradesman, sharpening with a knife is a practical decision. Why have a dedicated blade for pencils, when the utility blade so adequately crafts a point?
For the outdoorsman, the omni-capable blade cuts tinder, opens cans, slices fruit, whittles sticks — and sharpens pencils.
How It’s Done
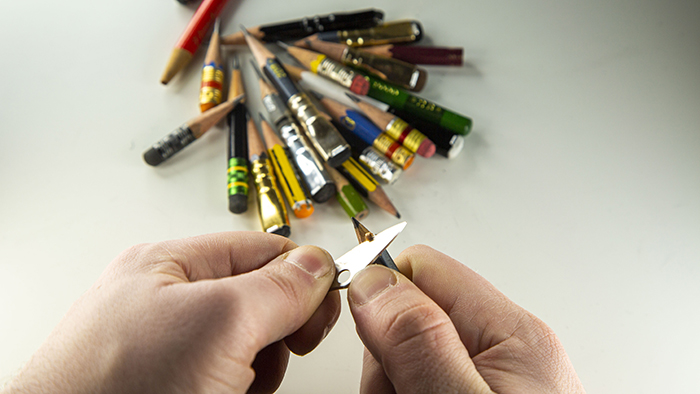
Sharpening by knife is swift, but demands a certain finesse. Too harsh and you can break your newly revealed point; too soft and you will spend all day to get one sharpened pencil.
Typically the action is to take the knife in your dominant hand, the pencil in your other. Gently peel the wood with the blade, such that you reveal a thinning cone of wood. Once you hit the graphite core, you can begin shaping the lead to your desired shape. Rounded bevel? Concave? Needle? The world, and the pencil, is your oyster, so to speak.
What It Produces
This method creates delightful curls of wood that are more reminiscent of wood shop than classroom. Graphite won’t really harm your blade, but it will make a fine mess, so perhaps give it a quick wipe down before you use your knife for anything else.
Any decent and sharp blade is suitable for knife sharpening a pencil. Even here in the UK with our much stricter knife laws, I can carry a diminutive Spyderco Bug and sharpen pencils to my heart’s content.
The Handheld Sharpener
- Required elements: A good handheld sharpener + the fortitude to avoid those junky cheap options that came with your Ticonderogas
- Time required: 1-2 minutes
- Complexity: 2/5
- Recommended tool: Apsara Long Point (~$0.25 each, but you may have to buy a box of ‘em)
The most obvious and familiar choice on the list, though still worth considering.
Who Uses It?
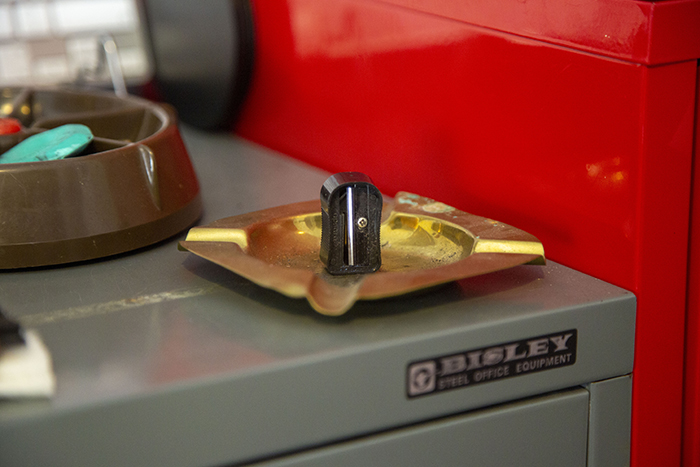
In school you probably had some plastic sharpener that came free with your pencils. Perhaps it was adorned with your favorite cartoon character or superhero. These are the steadfast workhorses of sharpening. Produced en masse and normally to a very poor quality, a bad handheld sharpener has probably been responsible for all the negative experiences you might have had with pencils.
How It’s Done
The structure is familiar: a plastic body, a screw, and a metal blade, held firm to a small window through which your wooden sharpenings emerge. You hold the sharpener in one hand and rotate your pencil in jaunting 180 degree rotations, producing flaky coils of sharpen and a fine scattering of graphite particulate.
What It Produces
The handheld sharpener primarily produces debris and disappointment. Most of the options you see on the market are terrible for sharpening pencils. The blade is dull, the casing warped, and any hope of producing a nice pencil point was gone before you started. There is hope, though; there are good options for handheld sharpening, and they can be had cheaply and easily. (Which really makes you wonder why so many of the offerings out there are so terrible.)
The Apsara Long Point sharpener is produced in India and is one of the best sharpeners I have ever encountered. At just over $4 for a box of 20, I buy these in bulk and surreptitiously swap out cheap and bad sharpeners any time I find one. The long point designation means this produces a longer pencil point, with a more tapered collar. The blades are delightfully sharp, and stay so for longer than you would expect. I keep two Apsara Long Points in my leather journal wrap, as they are dependable, simple, and easy to replace.
The Rotary Sharpener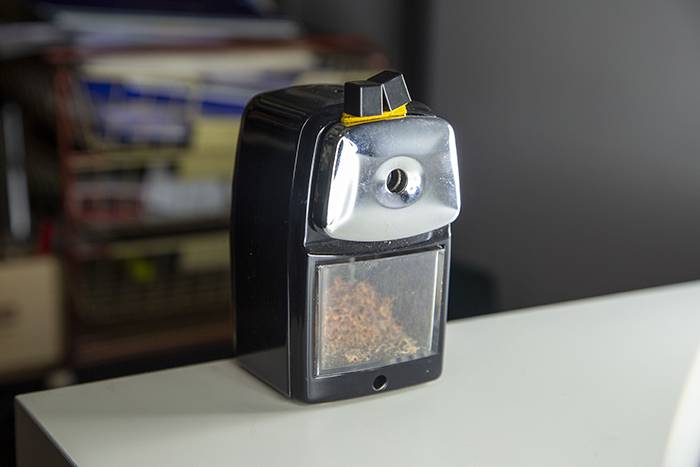
- Required elements: A rotary sharpener + a desk/wall
- Time required: 1-2 minutes
- Complexity: 2/5
- Recommended tool: Classroom Friendly (~$25)
The other kind of sharpener you’ve likely encountered, ancient and weathered, adorning classroom walls across the nation.
Who Uses It?
The desk-bound sharpener is typically of the rotary variety. In all our other examples, the blade is moved by the user to sharpen the pencil, which is relatively static. In this instance, the pencil remains static, and the sharpener revolves around it, slicing off tiny curls of wood and graphite and dropping them into a collection box below.
Classroom Friendly in the US make a fantastic rotary sharpener that is durable, cost effective, and produces lovely sharp points. It’s become a schoolroom institution for these reasons, and if it can survive a class of overzealous 8-year-olds, it’s good enough for you.
How It’s Done
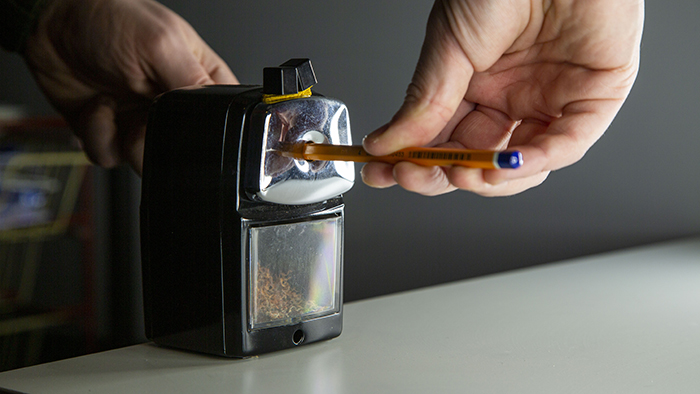
Desk-based sharpeners, electric or hand-cranked, have one or two rotary blades mounted to the inside. They look a bit like old school lawnmowers, and will do equally unpleasant things to your appendages if you stick them in there. The blades rotate on their own axis, as well as around the pencil. This shaves and grinds off a fine layer of pencil to reveal a fresh point.
By their nature, they tend to be larger, more unwieldy, and better suited to static applications. There are some smaller, more portable options, but I find it best to relegate them to home, office, or shop use.
What It Produces
The points from rotary sharpeners are as varied as the sharpeners themselves. You can have concave, convex, short, long, flat-topped or needle-pointed. As with any piece of small, niche hardware, it can be difficult to sharpen or replace the blades in rotary sharpeners, so if you’ve found a nice old one, but it chews up pencils, you might not be able to do much but swap parts out, or find a new sharpener.
The Rock
- Required elements: A medium to large size rock + grim determination in a life or death situation (this note must be really important)
- Time required: 15-20 minutes
- Complexity: 1/5
- Recommended tool: Ye olde rock ($0)
All of the options so far for pencil sharpening have assumed a level of convenience, privilege, and access to material goods. What if you have none of that? What if you find yourself, in the wilderness, in dire need of notation with nothing but your wits and an unsharpened pencil at your disposal?
Enter the garden variety rock.
Who Uses It?
Though I’m frequently guilty of losing track of this fact myself, let’s not forget that a pencil is just a cylinder of wood encasing a cylinder of graphite. While many complex and convoluted methods exist for its sharpening, the soft nature of graphite means that the act of writing will round and shape the lead for us; so all we really need to do to “sharpen†a pencil is to expose the graphite.
How It’s Done
Look for a medium to large size rock. Something with mass; something that you can sit beside or on to hone the perfect survivalist pencil point. Let us imagine in our heads the handheld sharpener from earlier, peeling layers as it rotates. Start scraping the tip of the unsharpened pencil on the rock, rotating as you go. Keep the point at around a 45-degree angle from the rock surface. We’re not trying to bore into the rock or start a fire — we want controlled abrasion that will eat away at the wooden armor of the pencil.
Proceed to whittle down the pencil through delicate and deliberate mineral abrasion.
If you happen to find yourself in an inhospitable jungle of the urban variety, I’m sure this technique would work equally well on pavement or tarmac.
What It Produces
The point, if we can call it such, will not be pretty. Rough and ready is probably being kind. It will, however, be functional, which is all we can really ask of a pencil in a wilderness-based survival situation.
The Gilded Rotary
- Required elements: An expensive pencil sharpener + a small loan
- Time required: 30 seconds for utility, but why rush? Take a full 30 minutes to really savor the experience
- Complexity: 4/5
- Recommend tool: El Casco (~$300)
In stark contrast to the previous option, this method assumes a level of luxury and comfort hitherto unmatched in the stationery world. It may surprise you to know that there exists a category of pencil sharpener above that of normal mortals.
Who Uses It?
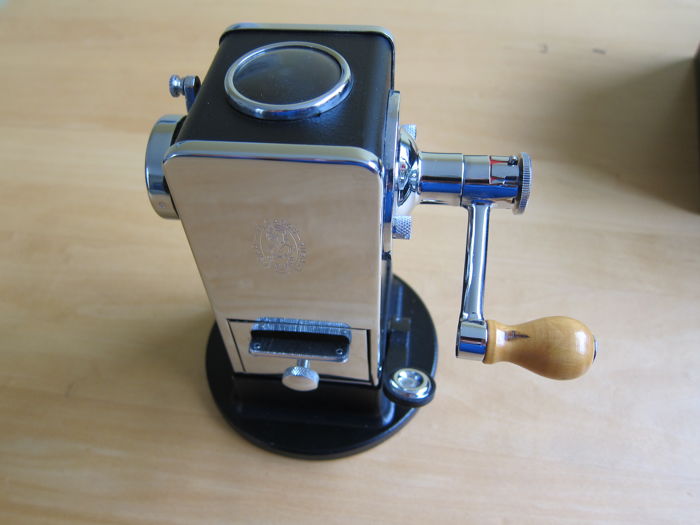
This is the Bentley of pencil sharpeners. Distinguished, refined, and elegantly crafted so as to measurably improve the life of those who are lucky enough to use it. The El Casco is a $300 majestic chrome and black pencil sharpener with all of the bells and whistles. The hand polished sharpener is presented in a gift box and features a sharpness regulator which offers the user a choice of four different pencil points, along with a chart for plotting out this decision.
How It’s Done
The El Casco is, at heart, a rotary sharpener, but it feels somewhat disingenuous putting this beauty and the battered and bruised classroom workhorse in the same category. It would be like parking my 13-year-old Ford Fiesta beside a Tesla Model X and saying, “Yeah, they’re both sedans . . . â€
The value of a $300 pencil sharpener is sure to bring up some spirited debate, but regardless of your thoughts on the efficacy, utility, or desirability of such an item, it looks damn fine while doing its job.
What It Produces
The El Casco has a sharpness regulator which controls the kind of pencil point produced and can even produce a pencil with a blunt tip and concave sides. There is a viewing window in the top for watching the mesmerizing dance of rotary burrs and a small file on the sharpening waste box for further refining your point.
Many folks hold the El Casco up as the reigning champion of all pencil sharpeners, and it has a dedicated and enthusiastic contingent of followers on and offline.
Others find it a little too fancy; it’s certainly too rich for my blood.
Oh, if by some chance you were worried that the steel and black lacquered El Casco wasn’t fancy enough for you, they also produce a 23k gold-plated version.
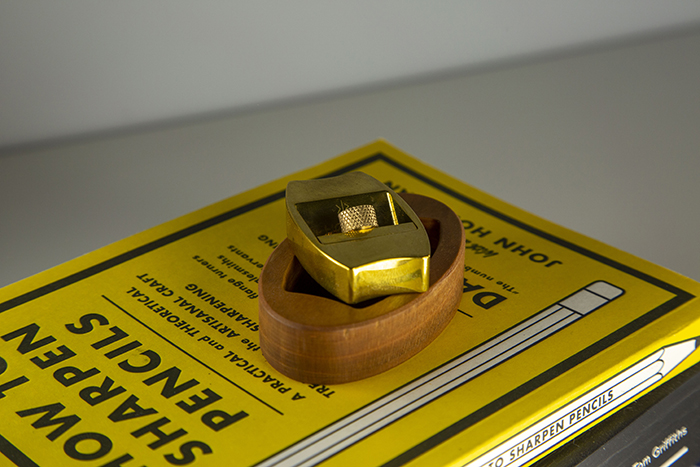
The Plane
- Required elements: A pencil planer + concentration
- Time required: 2-5 minutes
- Complexity: 4/5
- Recommend tool: The Hovel (~$60)
Unexpected and mysterious. This esoteric option sharpens pencils in a way that is unique but oddly familiar. A novel twist on normality.
Who Uses It?
Novel sharpening devices like the Hovel are typically reserved for those who enjoy the craft of sharpening pencils. Who find a little zen in the hypnotic and rhythmic dance of blade and pencil, wood and graphite. It’s slower than most of the other options, and more expensive to boot. What it offers is the allure of the unusual, and the focus of the deliberate.
How It’s Done
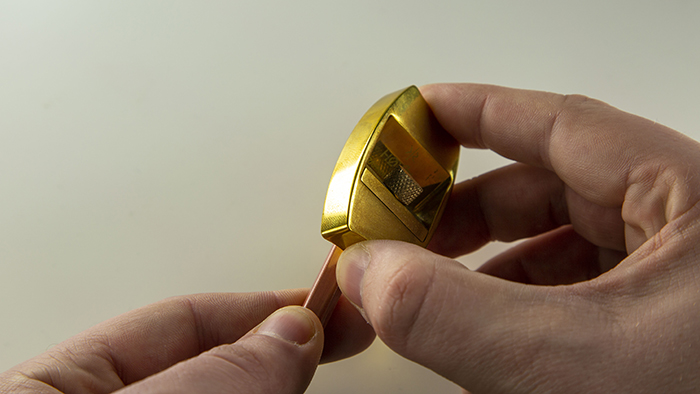
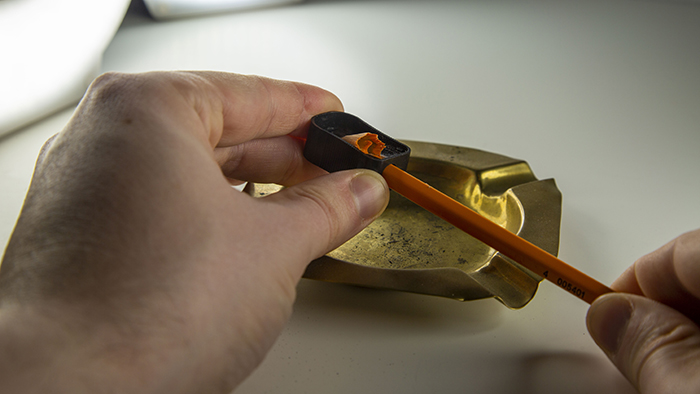
The Hovel is essentially a tiny woodworking plane for your pencil. It’s a small nugget of brass with a blade held firm with a set screw. You can raise and lower that blade to change the bite of the sharpener, and consequently how much material you take off each time.
There are two methods for sharpening: move the pencil, or move the Hovel. Anything else will put your fingers in danger and likely lead to a sudden and catastrophic inability to count to 10. The Hovel has an optional wooden base that makes stationary sharpening much easier and makes your office feel like a miniature wood shop.
What It Produces
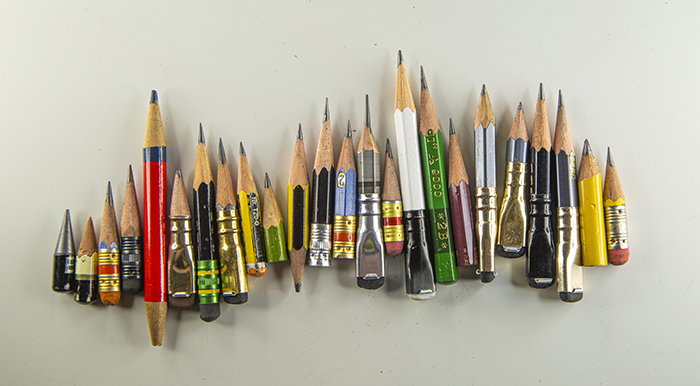
The kind of point that the Hovel produces is dependent on the user. You can create sharp facets, with just a few flat faces on each side of the pencil, or a graduated circumference of fine passes that mimic a rounded pencil. In most cases the point is long and sharp. It’s an extremely satisfying sharpening experience, and one that is not replicated in many other stationery offerings.
If you are of the woodworking persuasion, you might have access to a suite of woodworking tools, and could perhaps select one of the more diminutive planes from your collection and apply it liberally to the art of pencil sharpening. You could do that, but you didn’t hear it from me.
No matter how you sharpen your pencils — and the methods listed above have only started to, ahem, scratch the thin wooden surface of what’s possible — it’s important to find a method that works for you. Pencil sharpening is a necessary act, the penance we pay to use analog tools. It can be a rapid, purely functional act, or it can be a soothing, meditative balm in a world of push notifications and out-of-hours email.
Now, go forth, and keep your pencils as sharp as your mind.
___________________________
TJ Cosgrove is a pencil pushing filmmaker. He runs Wood & Graphite the #2 pencil-based video channel on the internet. He also talks about the past and the present in an anachronistic podcast called 1857. He likes hard science fiction novels, pencils and American beer, though not necessarily in that order.
Tags: Writing