
Evidence of the use of travois — pulled sleds made with two-pole frames — dates to before the invention of the wheel. Its long history is unsurprisingly, as the vehicle’s incredibly simple design allows an individual to carry much larger loads over long distances. Travois were commonly used by American Indians, who relied on the contraptions to help them move supplies between camps. Sometimes, they’d drag a travois by hand, or over their shoulder. Or, they’d create specialized travois to hook onto working dogs and horses.
For those heading into the backcountry today, understanding how to make a travois is a potentially life-saving skill. It means hauling more firewood in a survival situation or moving an injured friend and their gear to safety. In less dire circumstances, like when hunters need to transport a kill from a remote site back to their vehicle, a travois is a helpful and practical tool.
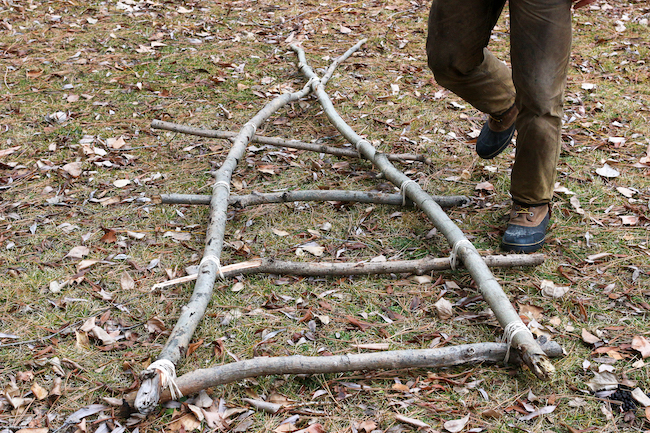
At its core, a travois is made by lashing poles together to form an isosceles triangle, supported by additional poles or netting. Making one on your own requires nothing more than some cordage and an axe or hatchet. Here’s how to get started.
How to Make a Travois
Step 1: Gather Poles
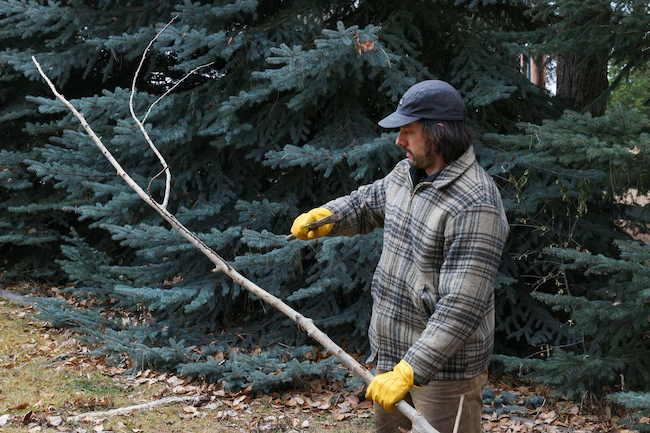
Gather two long poles, about 12 to 15 feet long and four shorter poles, approximately 3 to 4 feet long each. In general, look for poles that are approximately 3 to 5 inches in diameter at their thickest.
Ideal pole diameter depends mostly on the quality of the wood. For example, cutting live branches from a hardwood tree yields a much stronger pole than collecting a dead pine branch or other softwood. Your travois needs to be sturdy, but choosing poles that are too big will make it unnecessarily heavy and inefficient.
Step 2: Trim the Poles
Trim your long poles to equal length and remove any small branches, then do the same for your smaller poles.
Step 3: Arrange Long Poles
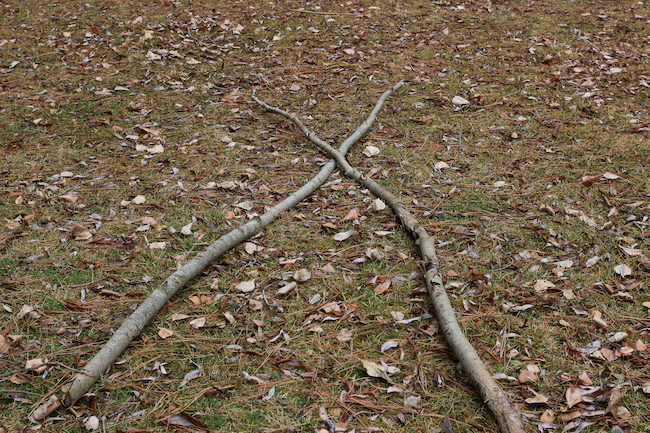
Do a dry fit of your poles by arranging your long poles in an X shape. The poles should cross at about two-thirds of their length. You can test the shape by standing in the smaller notch of the X to ensure you can comfortably fit in the travois and pull it.
Step 4: Add Short Poles
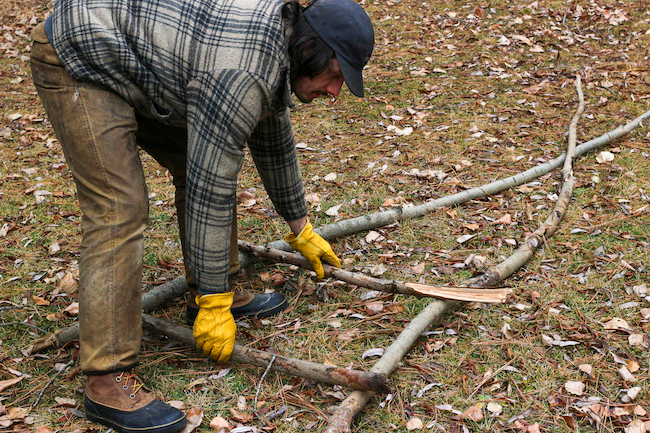
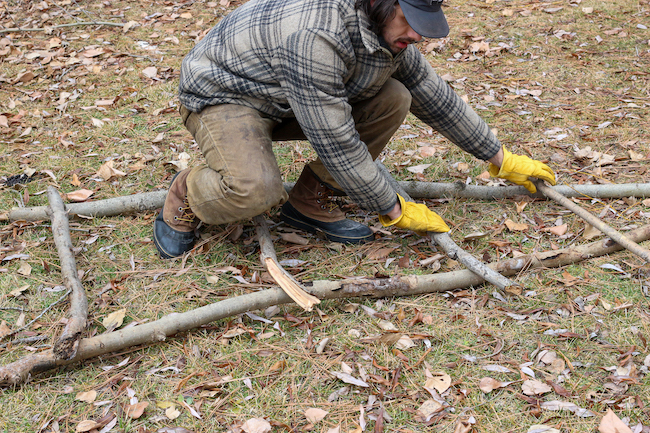
Add your short poles to the travois mock up, spacing them out evenly, and ensure they are long enough to span the distance between your travois legs.
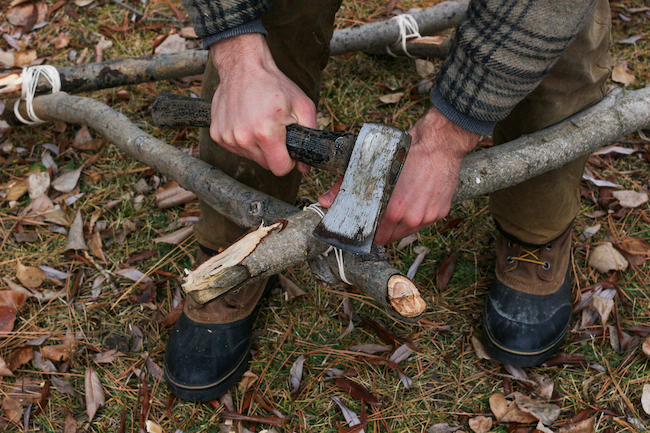
Step 5: Lash Long Poles
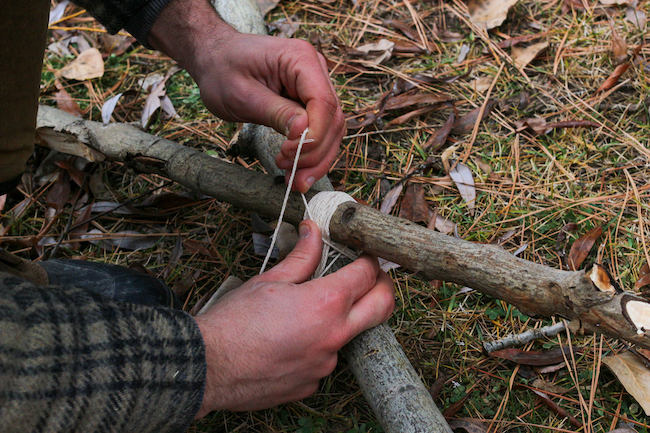
Lash the long poles together where they cross, using whatever cordage you have available. Need to brush up on your diagonal lashing techniques? Check out our guide here.
Step 6: Lash Short Poles
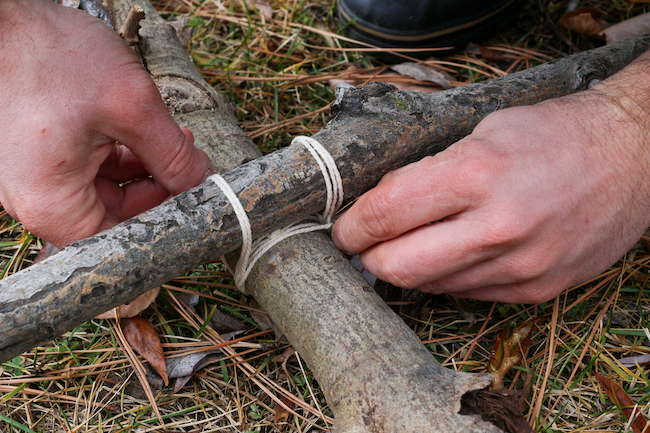
Lash the short poles onto the travois legs. For these connections, use a square lashing method.
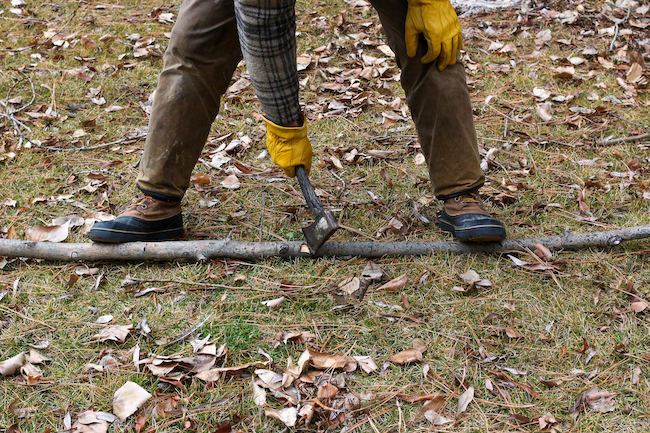
Step 7: Trim the Feet
Flip the travois over and use a hatchet or knife to angle the travois feet so that they slide along the ground.
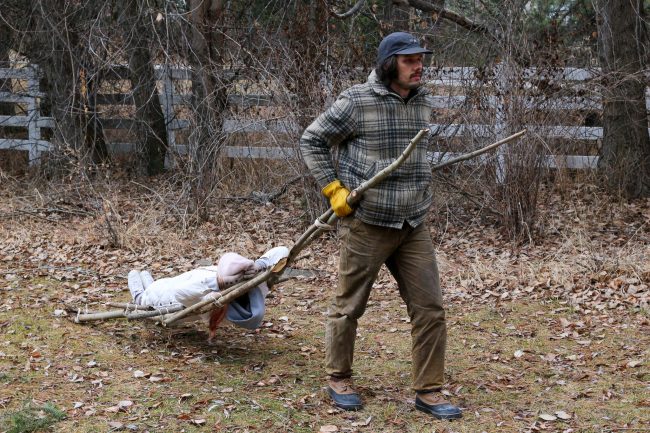
Step 8: Load Up and Get Going!

Flip the travois back over, check your lashings, load up your gear or injured friend and get going!