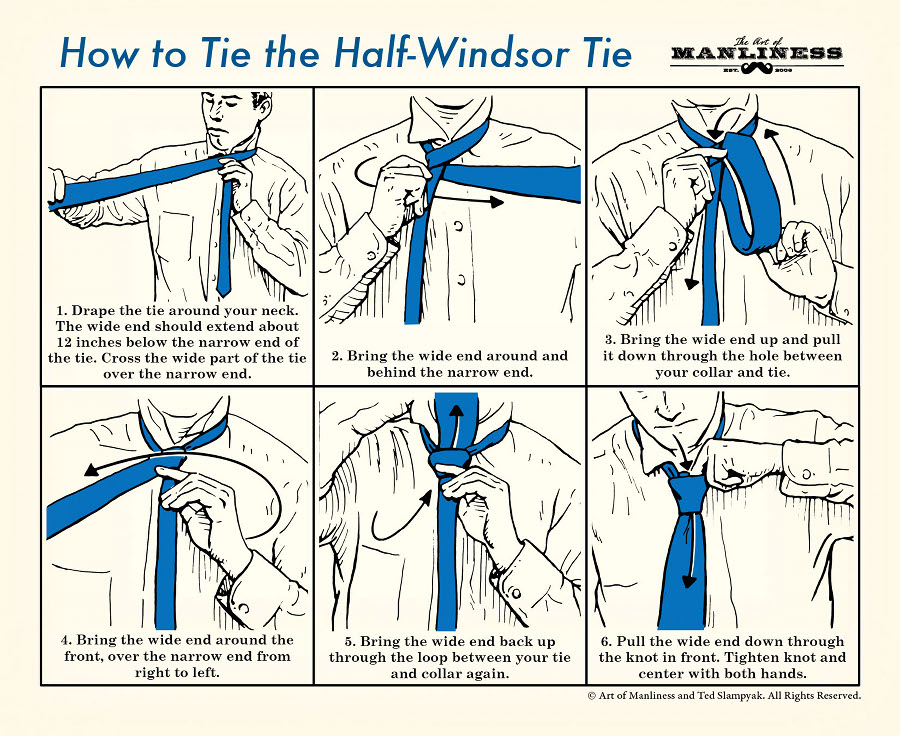
Many young men heading out on their own for the first time have never tied a tie themselves. If that’s you, I’d recommend the Half-Windsor as the first necktie knot you learn. While the Four-in-Hand is the easiest knot to tie, the Half-Windsor looks more symmetrical and formal, while being less bulky than the Full Windsor. It’s a very versatile knot, appropriate for all occasions, and goes well with nearly every collar type, except narrow collars.
Once you’ve mastered the Half-Windsor, branch out and learn how to tie other necktie knots, and the bowtie as well.
- Drape the tie around your neck. The wide end should extend about 12 inches below the narrow end of the tie. Cross the wide part of the tie over the narrow end.
- Bring the wide end around and behind the narrow end.
- Bring the wide end up and pull it down through the hole between your collar and tie.
- Bring the wide end around the front, over the narrow end from right to left.
- Bring the wide end back up through the loop between your tie and collar again.
- Pull the wide end down through the knot in front. Tighten knot and center with both hands.
Like this illustrated guide? Then you’re going to love our book The Illustrated Art of Manliness! Pick up a copy on Amazon.
Illustration by Ted Slampyak

